
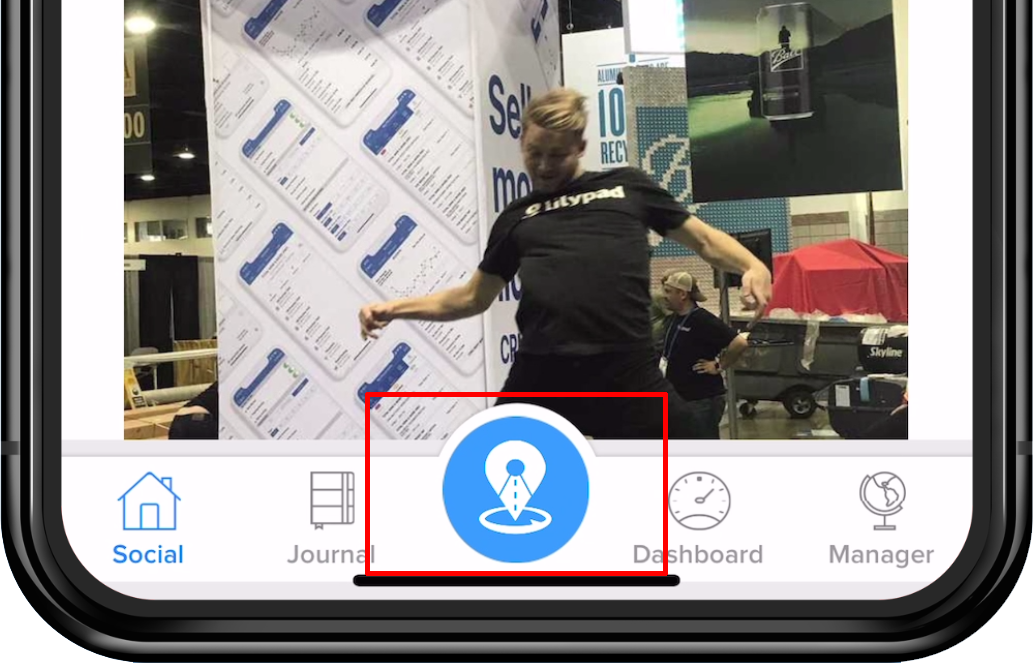
The blue pushpin in the Lilypad app can be found at the bottom of the social wall screen. Click into this icon to gain access for more information as outlined below.
The screen should look similar to the above image, giving access to items such as Activities, Tasks, the Account universe, Plan and Placements. Read below for what each of these tabs can do.
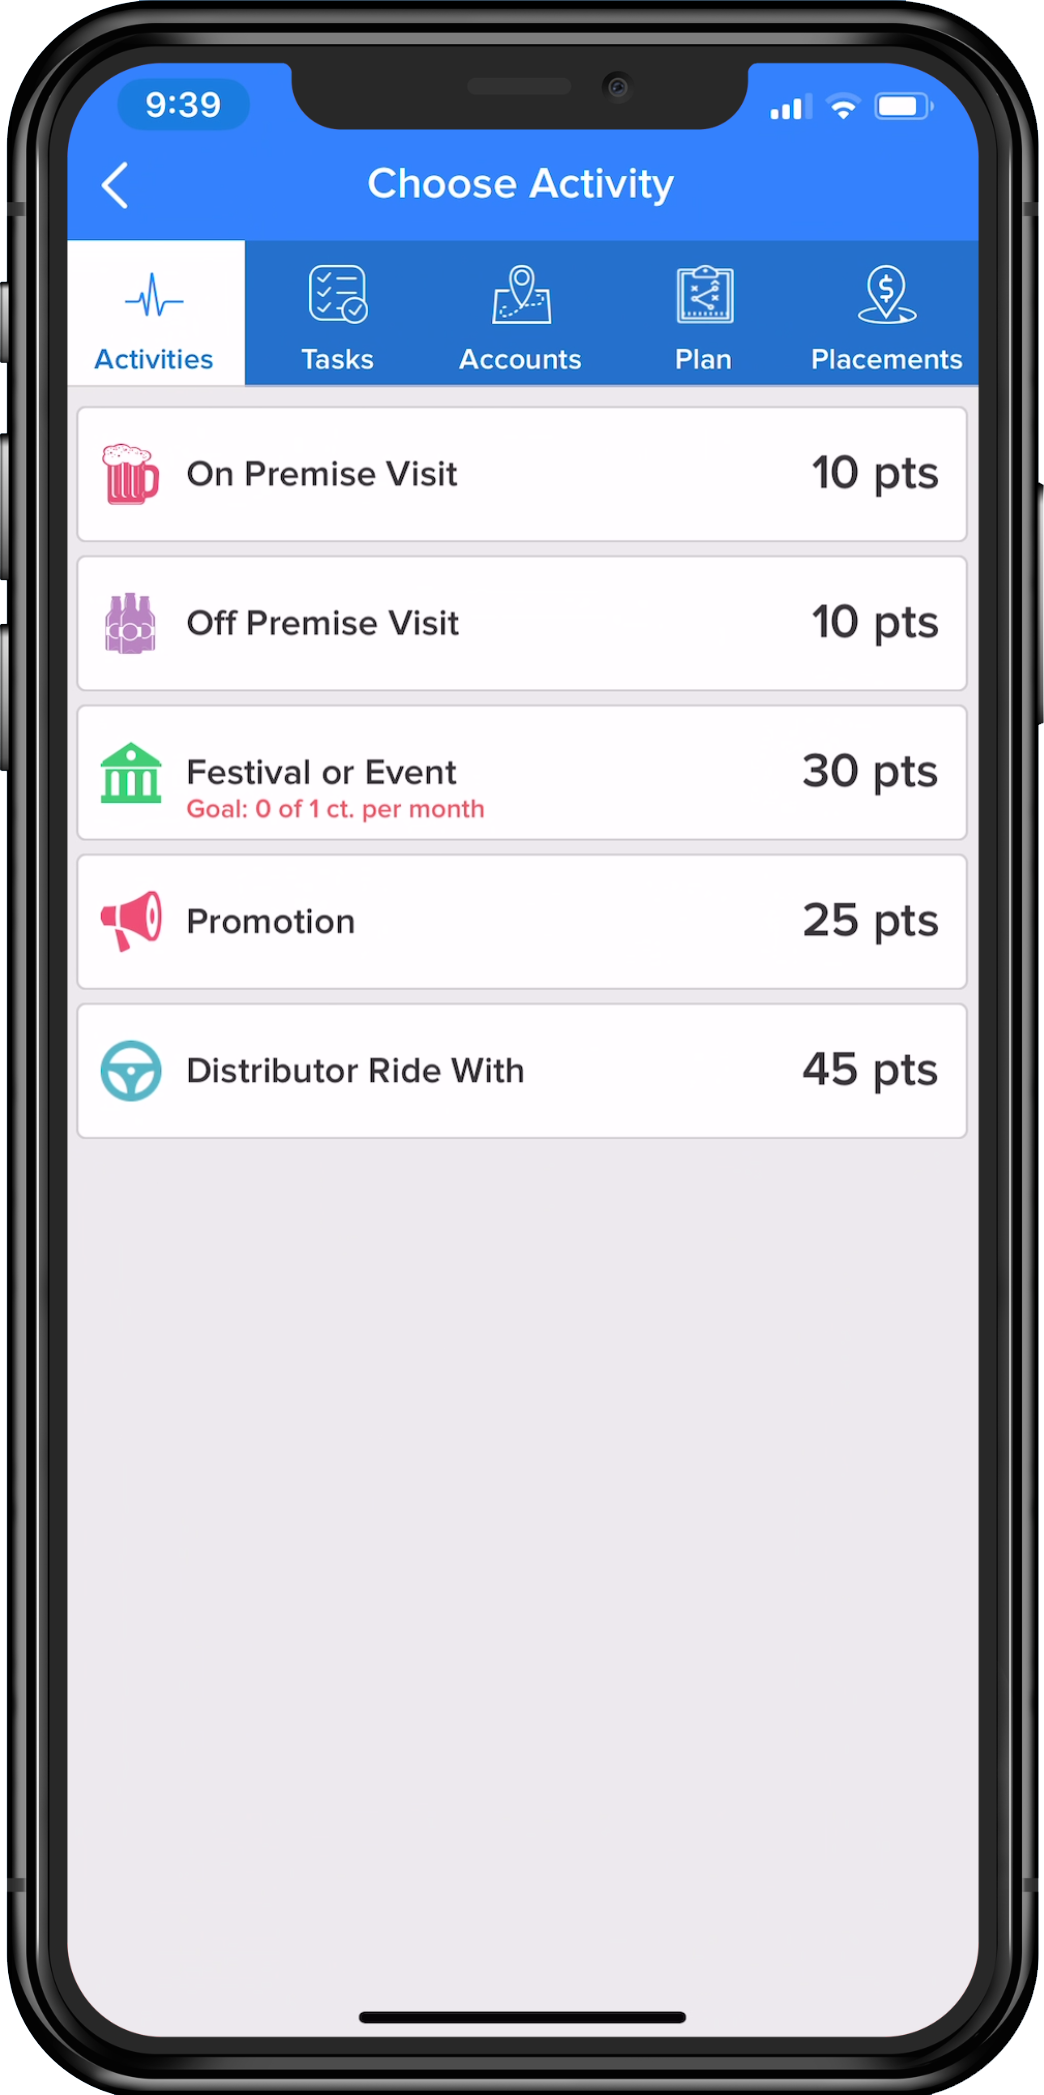
Activities - Tab
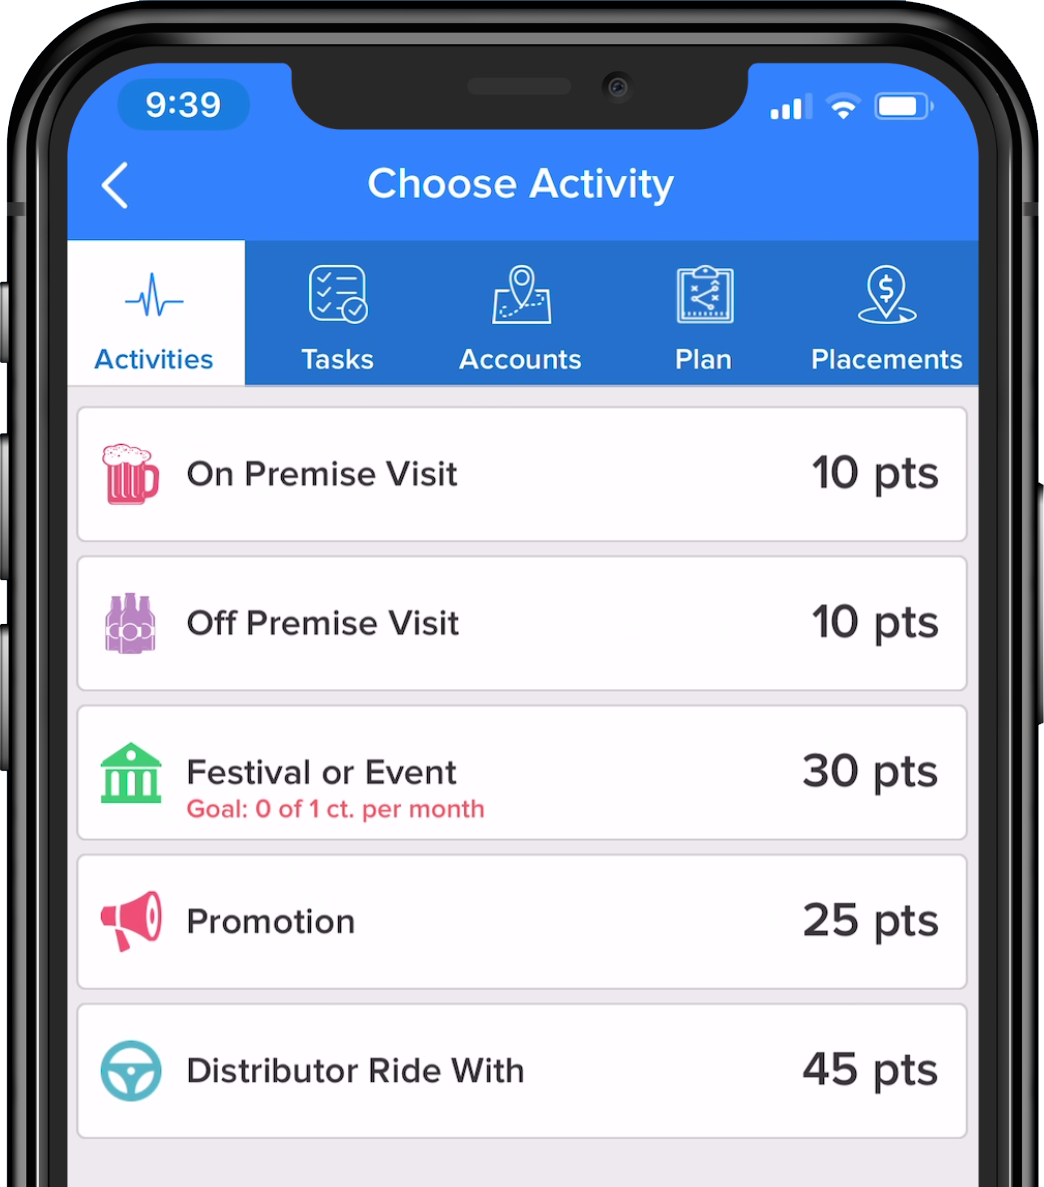
The Activities Tab allows the user to log any market actions that a Manager or Lilypad admin has created. To get started, follow the steps outlined below:
Select the Activity to log by clicking on that Activity.
If this Activity is something to be completed within a specific account, choose the account from the Account search screen.
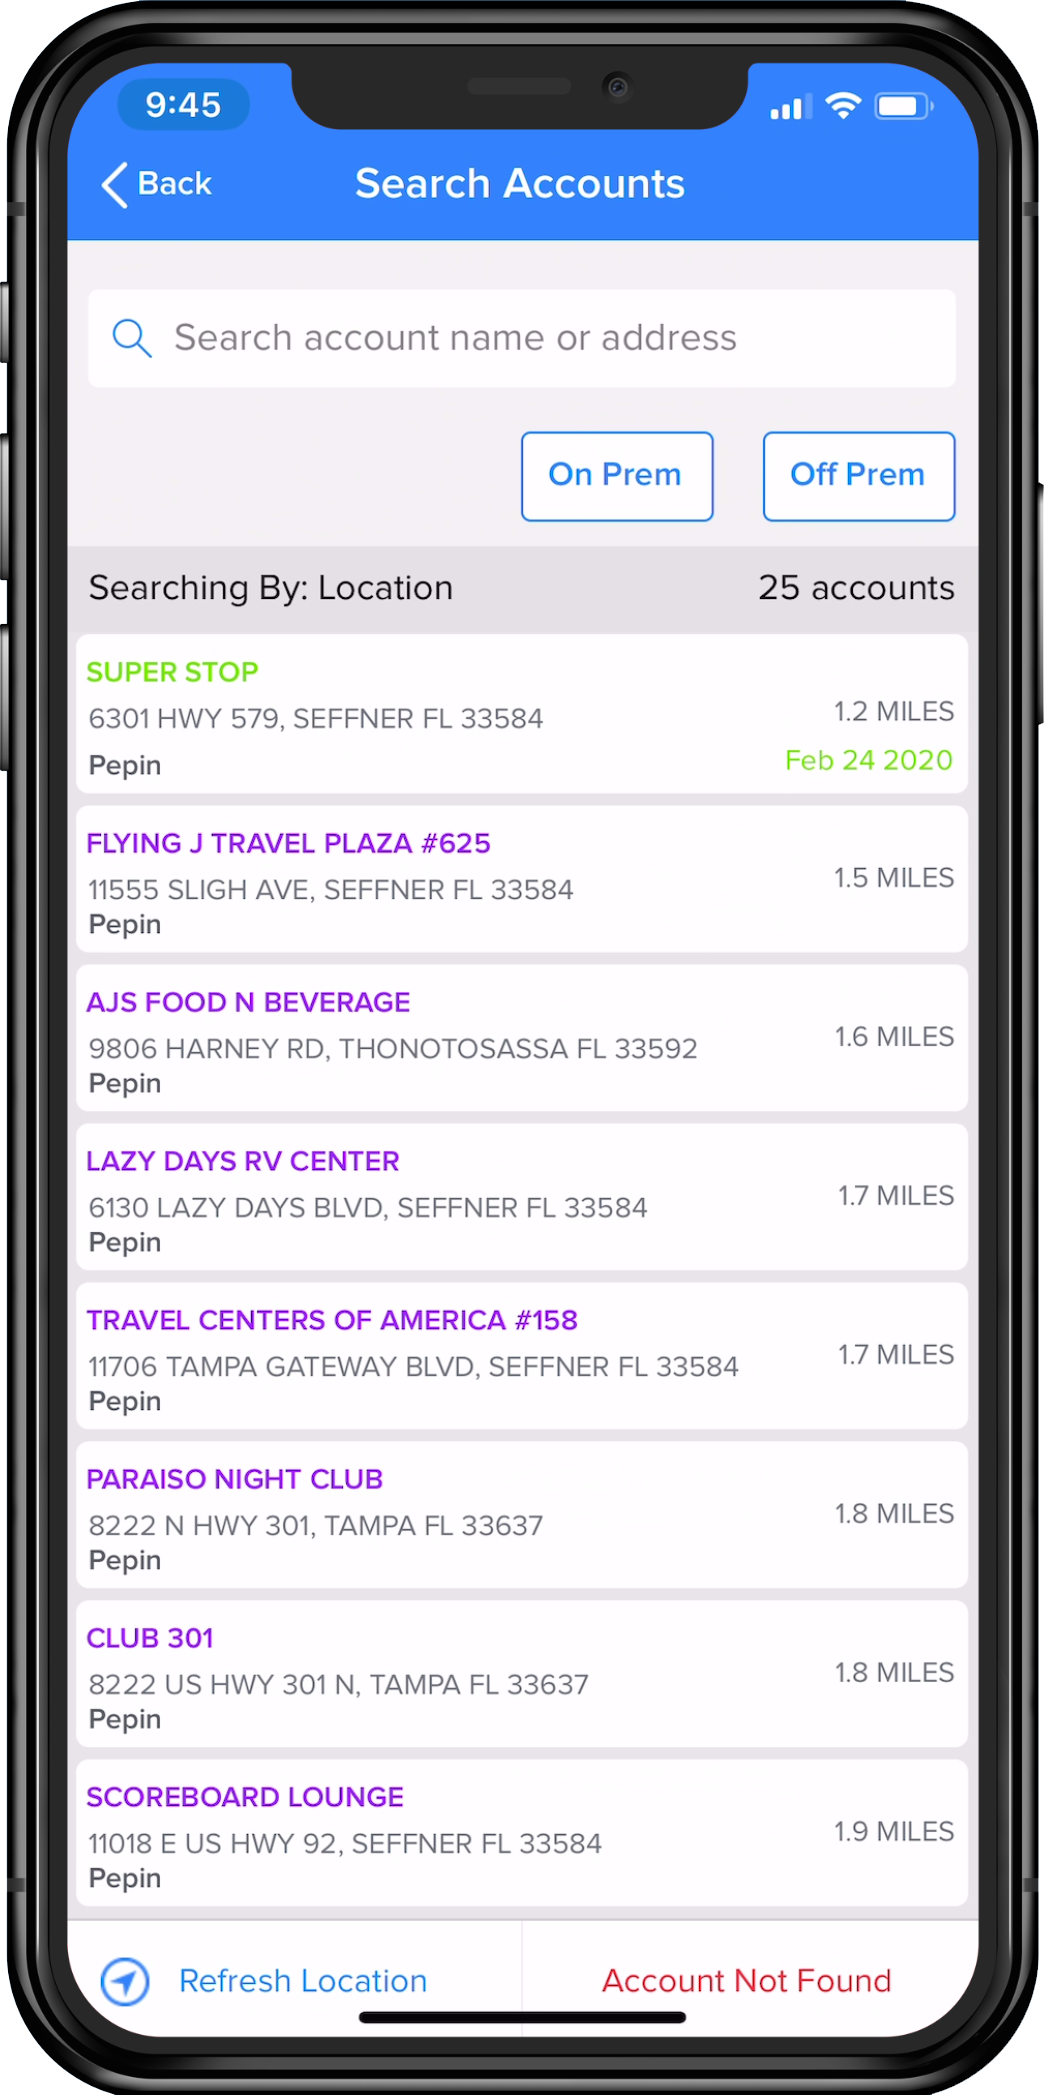
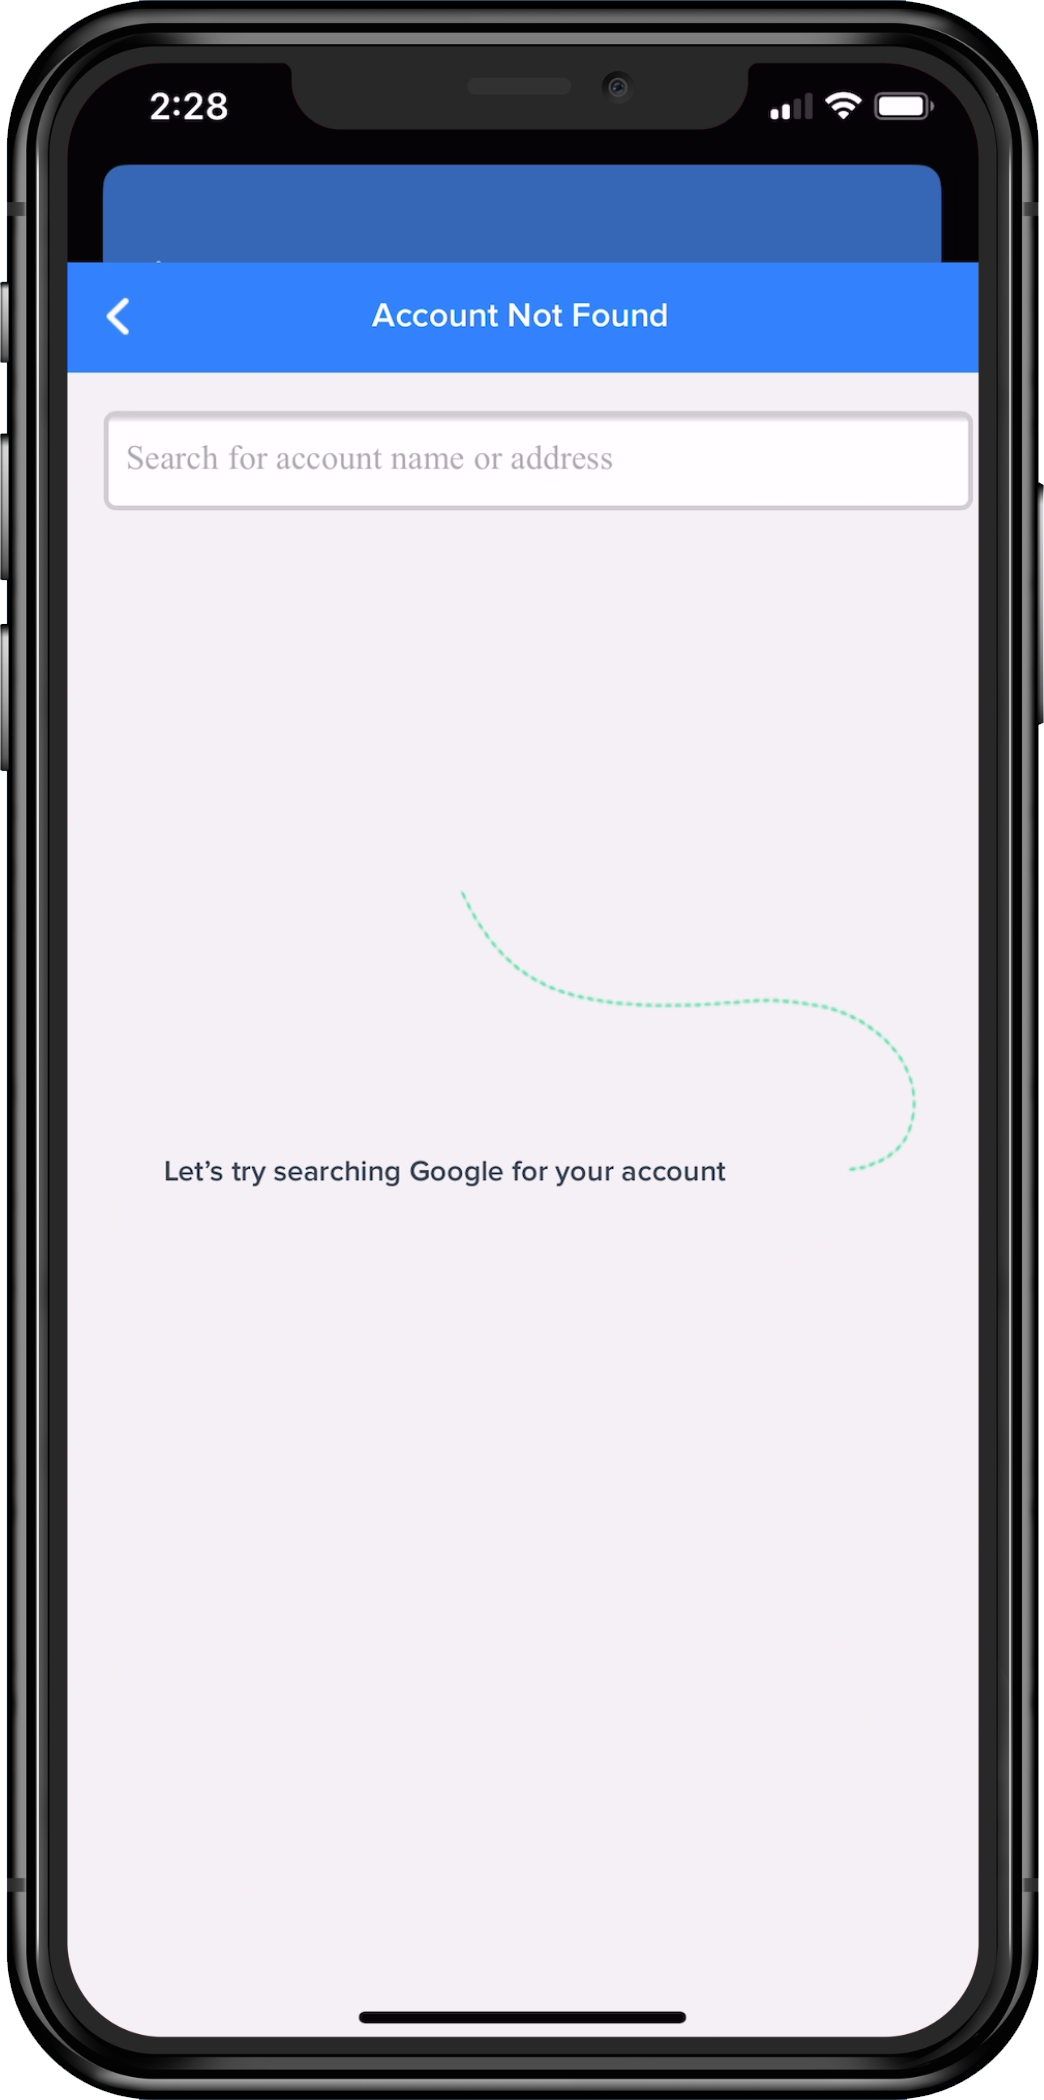
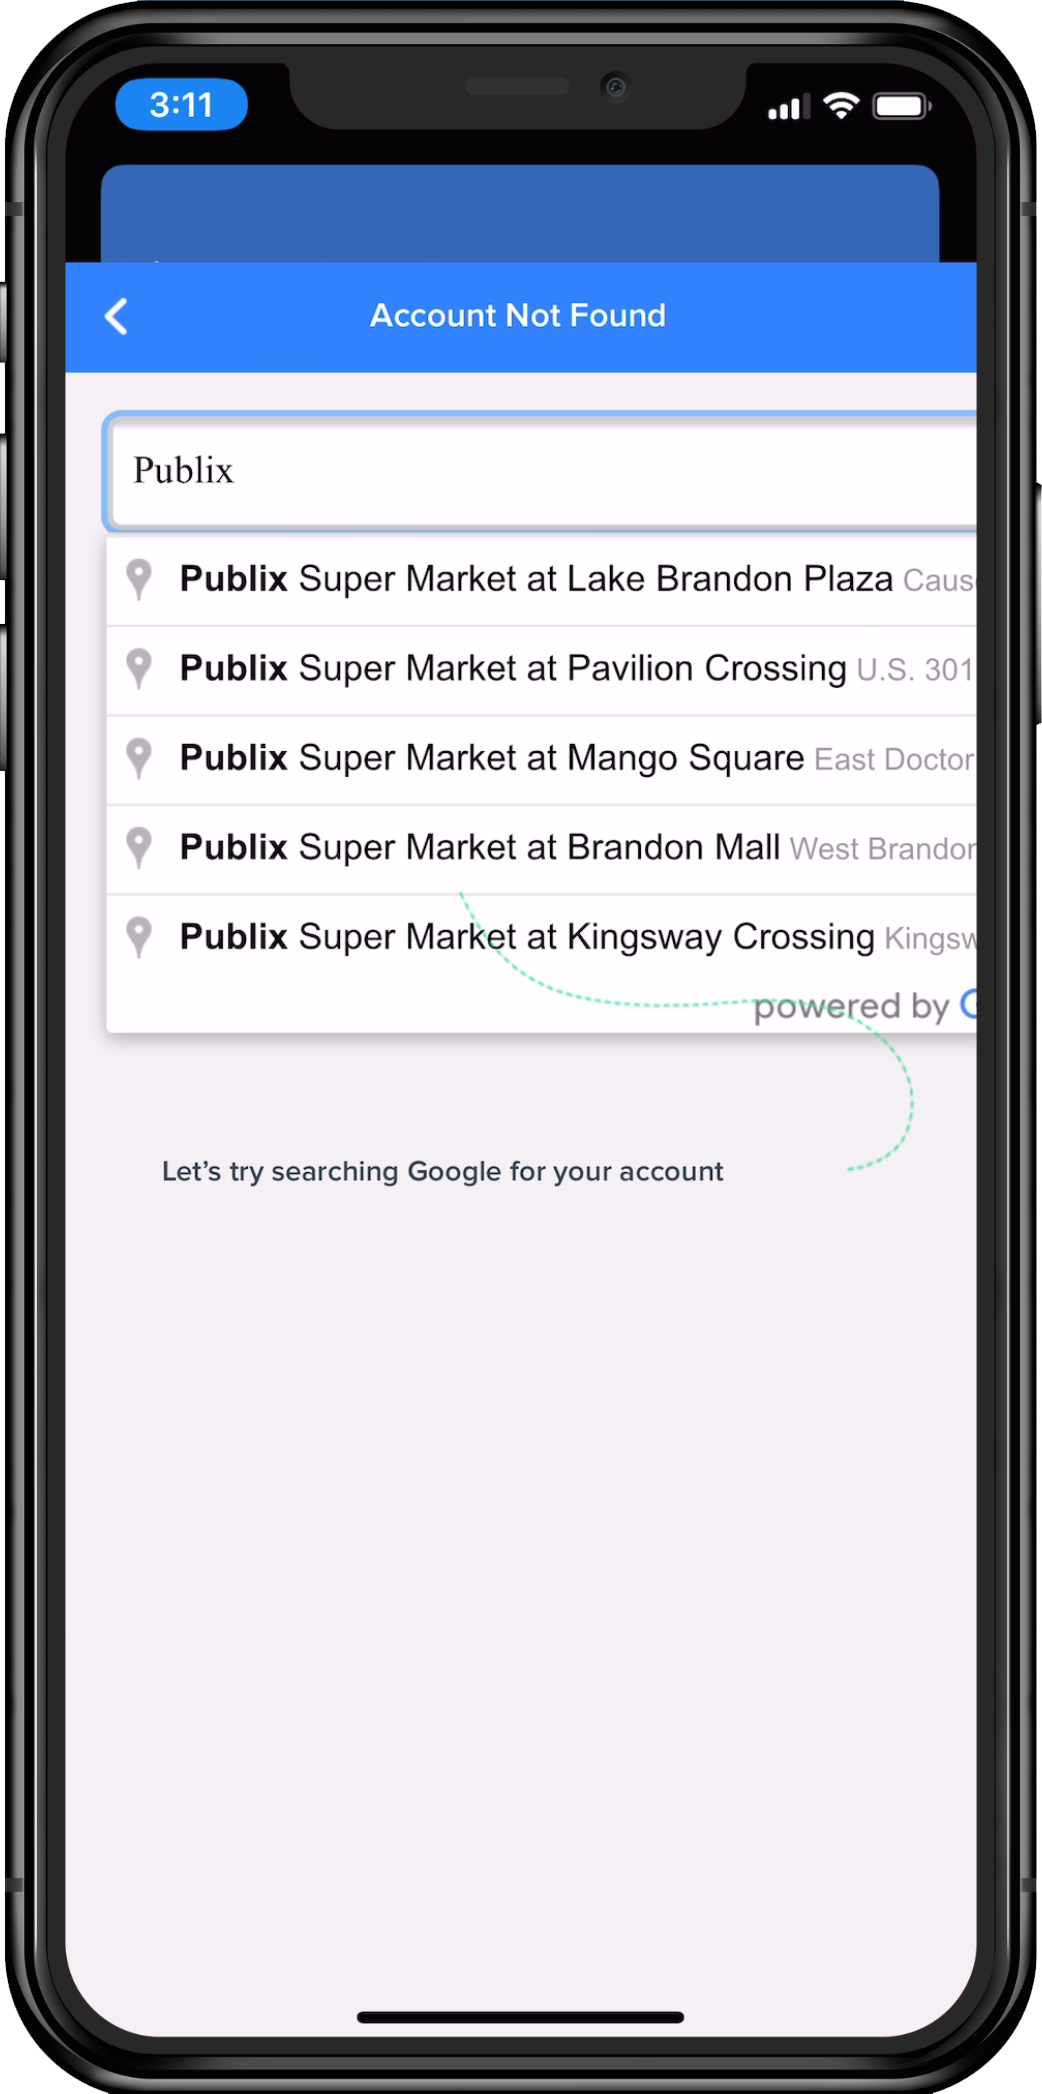
If the Account cannot be located choose the "Account Not Found" text at the bottom right. A search bar will appear to easily search the area for the Account. A user can search by entering a keyword in the name, or the numbers of the street address. If those searches result in the user still unable to locate the account, see the Tasks - Tab - Add A New Account for how to Add A New Account.
If this Activity is tied to a specific account, the Account contact and Distributor contact will need to be entered. (Unless the organization's team is on Route Mode - then a Distributor contact will not be required)
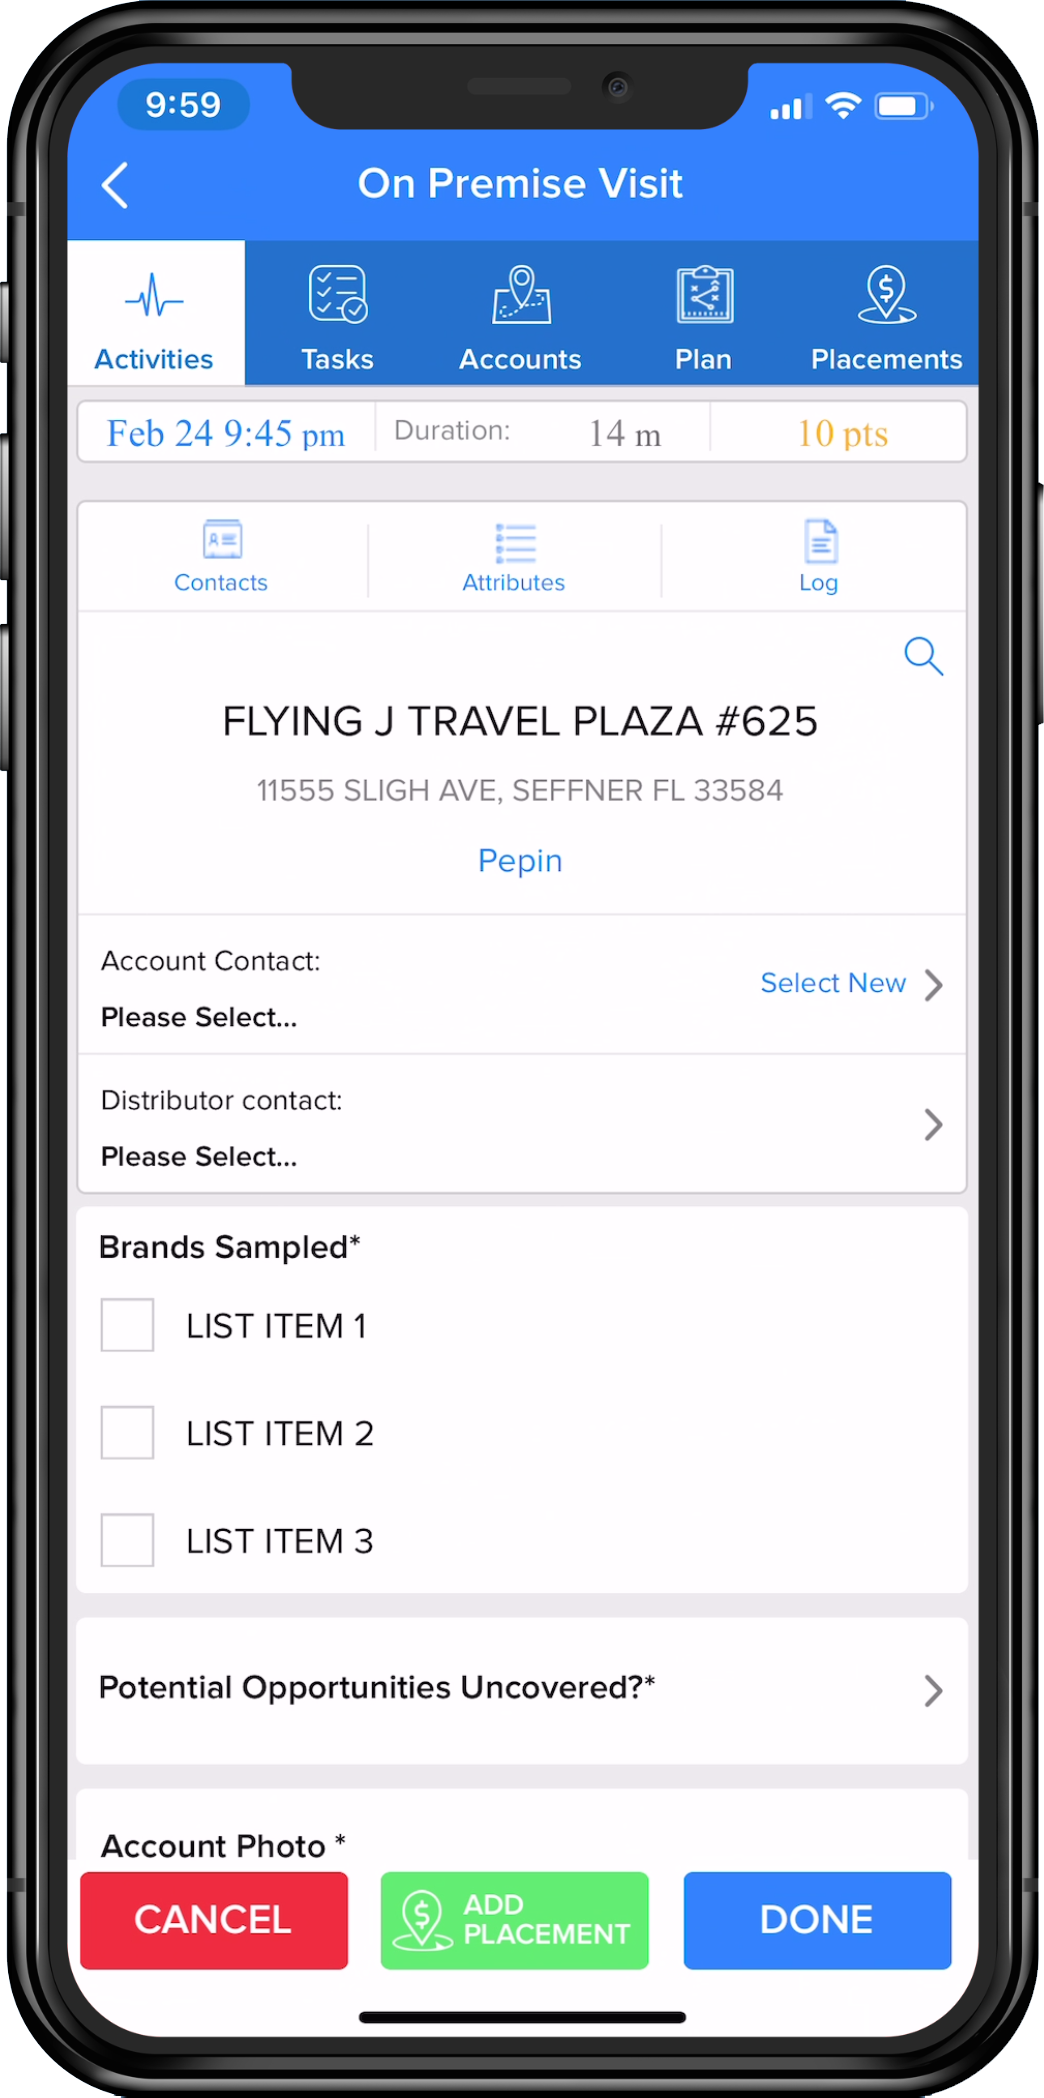
If this Activity is something that does not need to be completed within a specific account, the screen that populates will be the activity survey as seen above, minus Account info.
Fill out each field (called a Survey Question). Required fields are denoted by an asterisk (*) at the end of the field title. These asterisked fields must be filled out in order to complete the Activity.
Click the blue “Done” button in the bottom right corner of the screen.
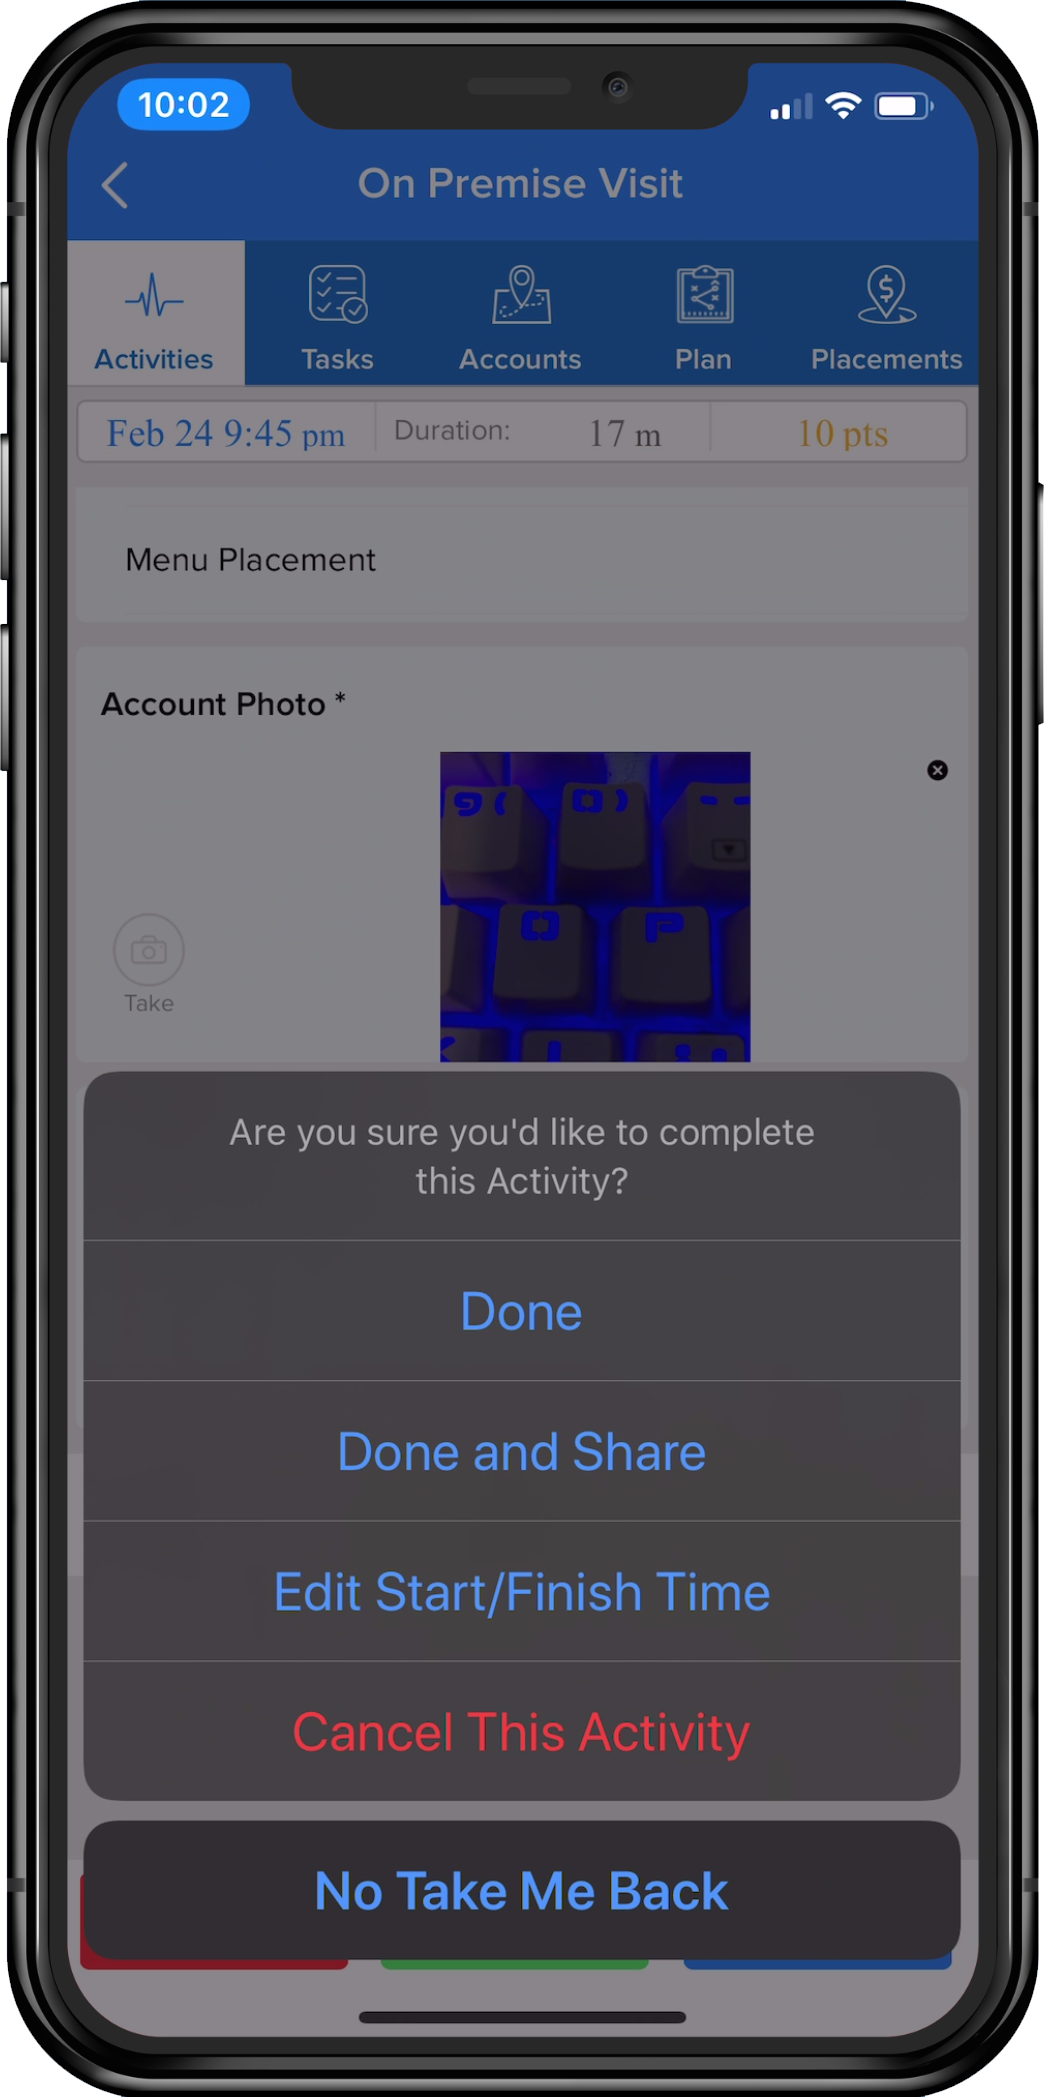
When the completion pop-up opens, there are a number of choices aside from cancelling the Activity or taking the user back into the Activity.
- “Done” - logs the activity and re-directs to the social wall screen.
- “Done and Share” - logs the activity and re-directs to the social wall screen, while additionally auto-generating an e-mail recap of the information just entered in the activity.
- "Edit Start/Finish Time" - allows the time for the Activity to be edited.
Quicklinks - Tabs
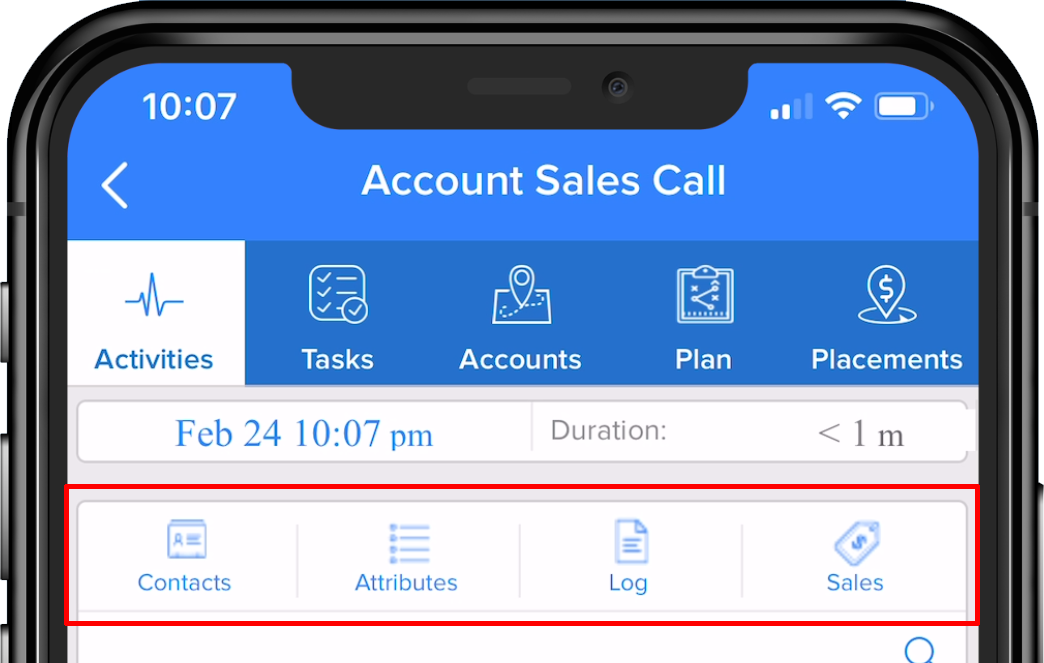
Quicklinks are a way to quickly add detailed information to specific Accounts while logging an Activity or Task. There is no need to move from tab to tab outside of an Activity or Task.
Contacts
The Contacts tab is the only place within Activities and Tasks to edit or remove contact information.
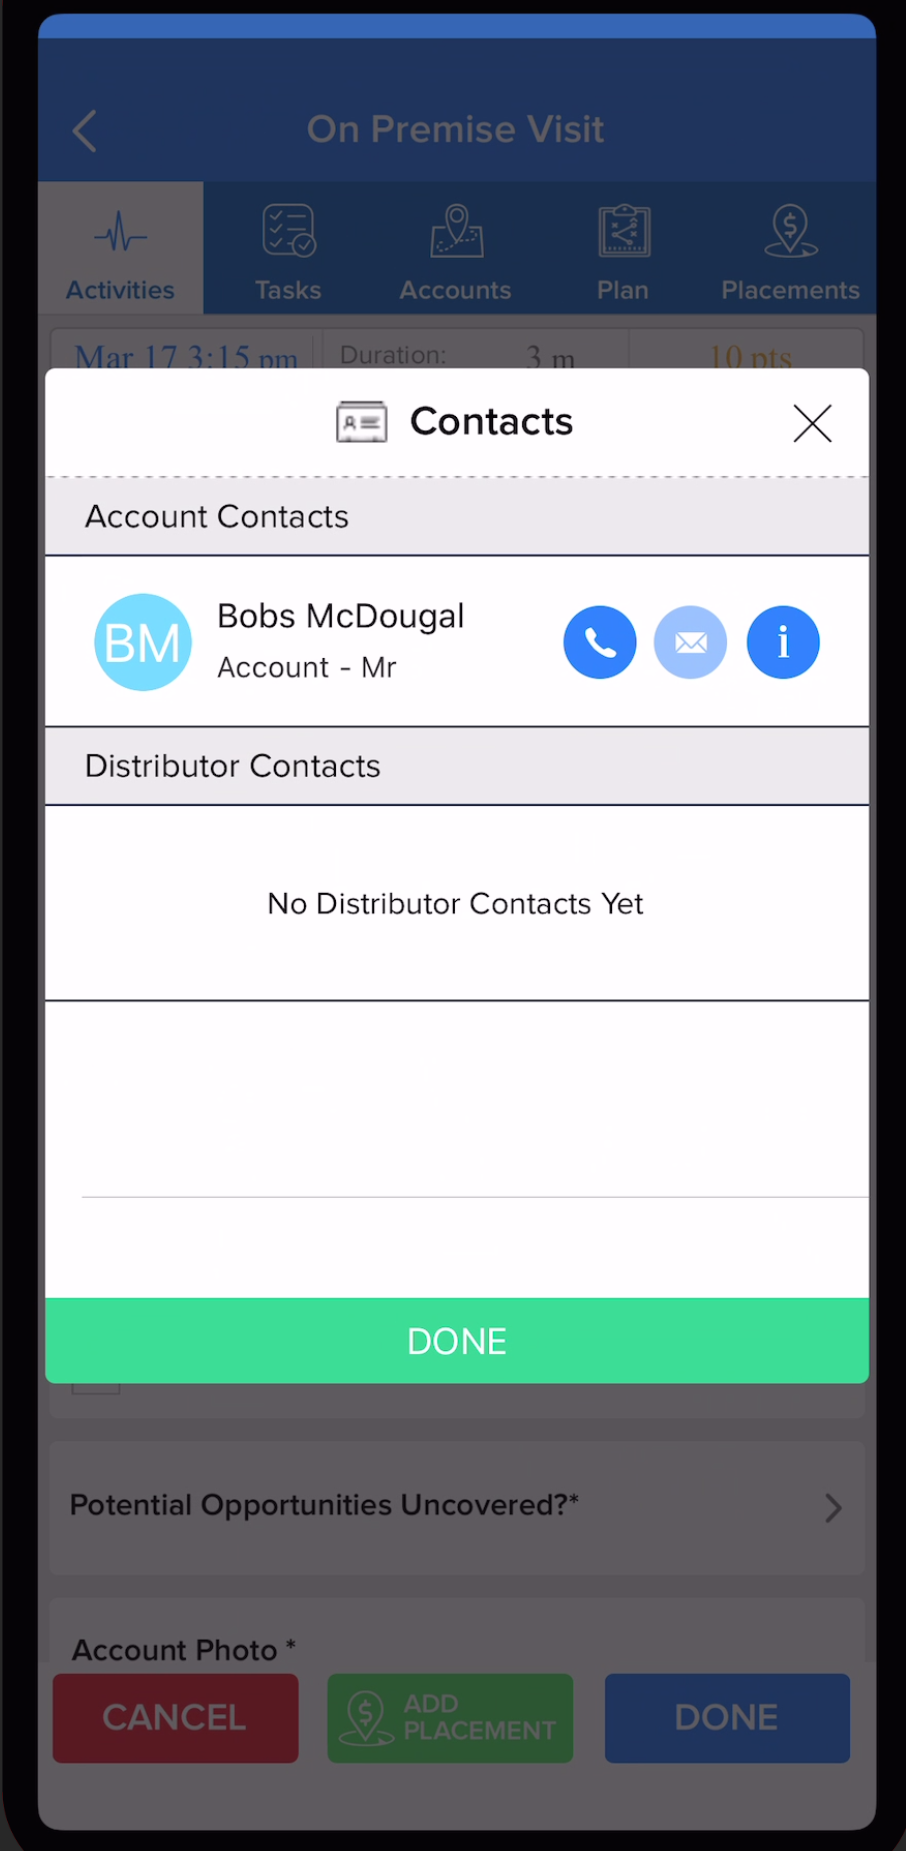
A user can -
- View the contact’s name and title.
- Click on the phone icon (if lit in dark blue) to call the contact directly from the Lilypad app.
- Click on the envelope icon (if lit in dark blue) to e-mail the contact directly from the Lilypad app.
-
Click on the info icon (if lit in dark blue) to open up and make changes to the contact.
- Fields that can be adjusted are; contact’s first name, last name, title, phone number, e-mail address, and any notes that apply to the contact.
- At the bottom left corner of the screen there is a “Save to Contacts” button which will save the contact information to the device.
- At the bottom right corner of the screen there is a “Delete Contacts” button which will remove the contact information from the account profile.
- After the necessary adjustments have been made, click “Done” in the top right corner to save the changes.
Attributes
When in an Activity or Task, Attributes allows a user to view and set static characteristics of the account.
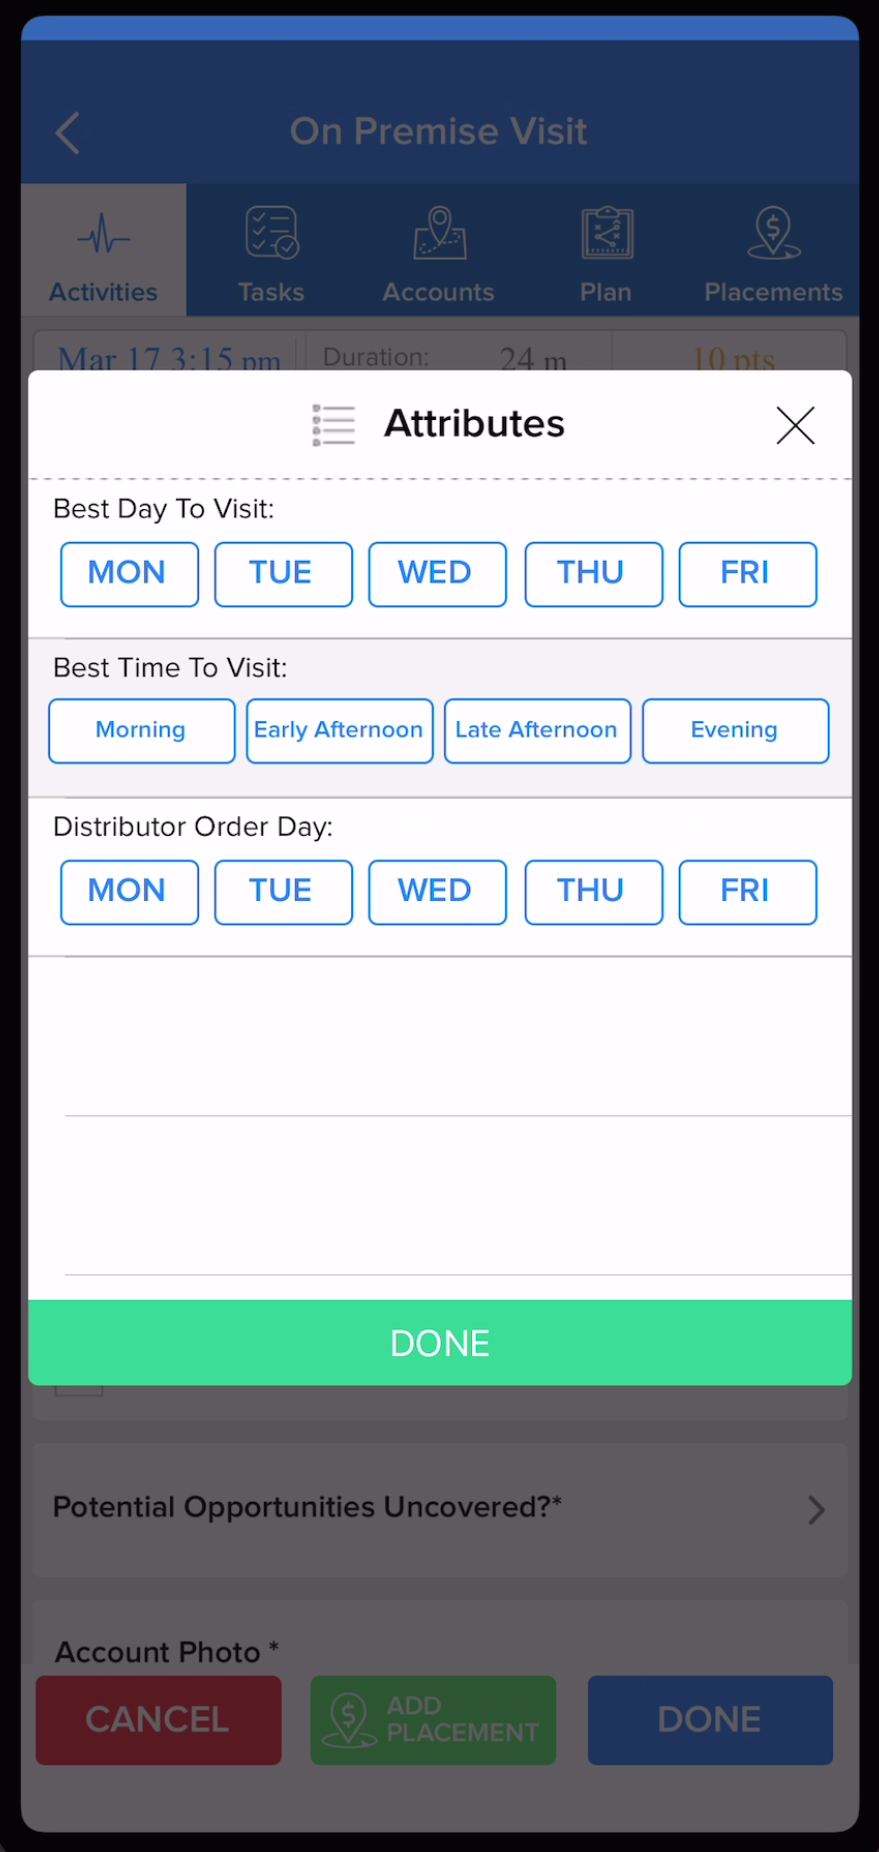
Once selected, these attributes stay tied to the Account's profile page. Some attributes are map filterable as well, meaning they can filter the account universe using this information to focus on specific accounts within certain geographical areas. There are also reports that utilize the Attributes as filters.
Log
In Activities or Tasks, this is where any previously logged entries within the Account can be viewed.
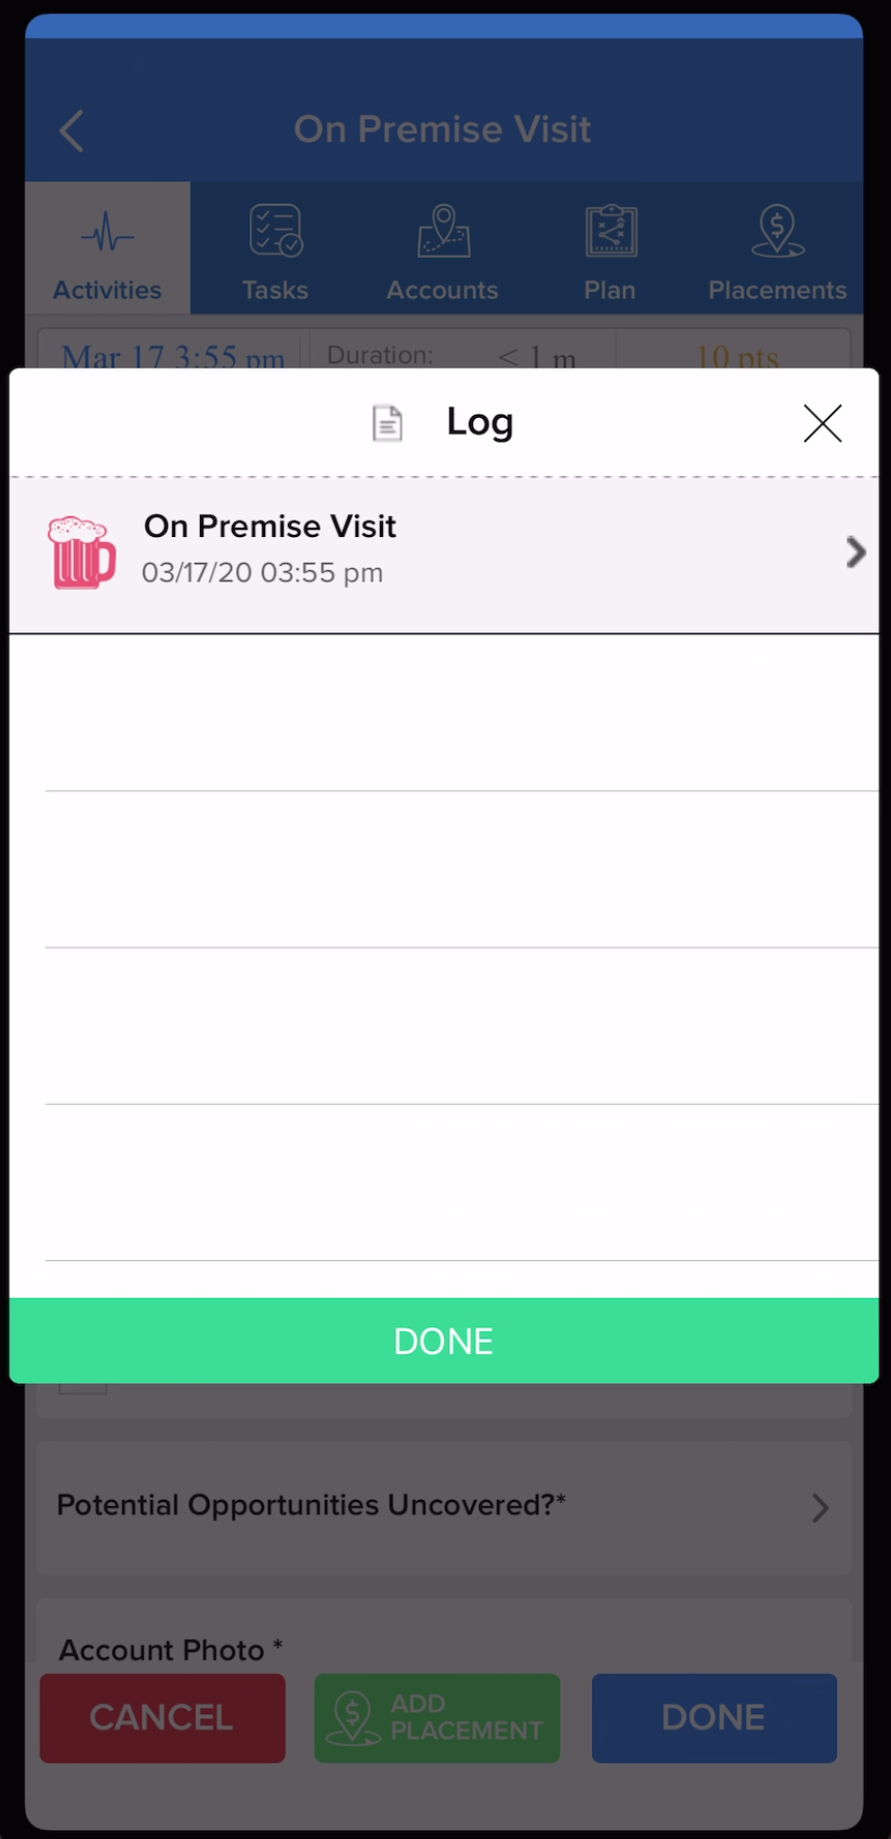
No matter who has logged an action within this account or how long it has been since that action was logged, a full list of each log made will appear - along with name of entry, date, and time logged. Clicking into these individual logs will display all of the detailed information included in that entry.
Sales
This displays 30, 60, 90 day, or YTD sales information within this specific Account and is only available if there is sales data being reported by an integrated data source (IE; VIP, Encompass, LDS Data, etc).

- Choose the time period in the top left corner of the window that populates.
- A comparison of previous year vs. current year to-date in sales for the specific time period is displayed.
- Under BRANDS, a breakdown of specific brands sold within that account is displayed in a list format.
Tasks - Tab
In the Tasks tab, a user can -
- Add a new Account
- Fulfill any tasks assigned by a manager.
How to Add an Account
**Sidenote - adding an account should only be completed if the user knows for a fact that the account does not exist within the account universe. If an account is manually entered, and causes duplication, this may lead to errors such as users logging to the incorrect Account. That in turn, may cause issues with Target List goals and Sales data not being shown as expected (only for clients with data connections).
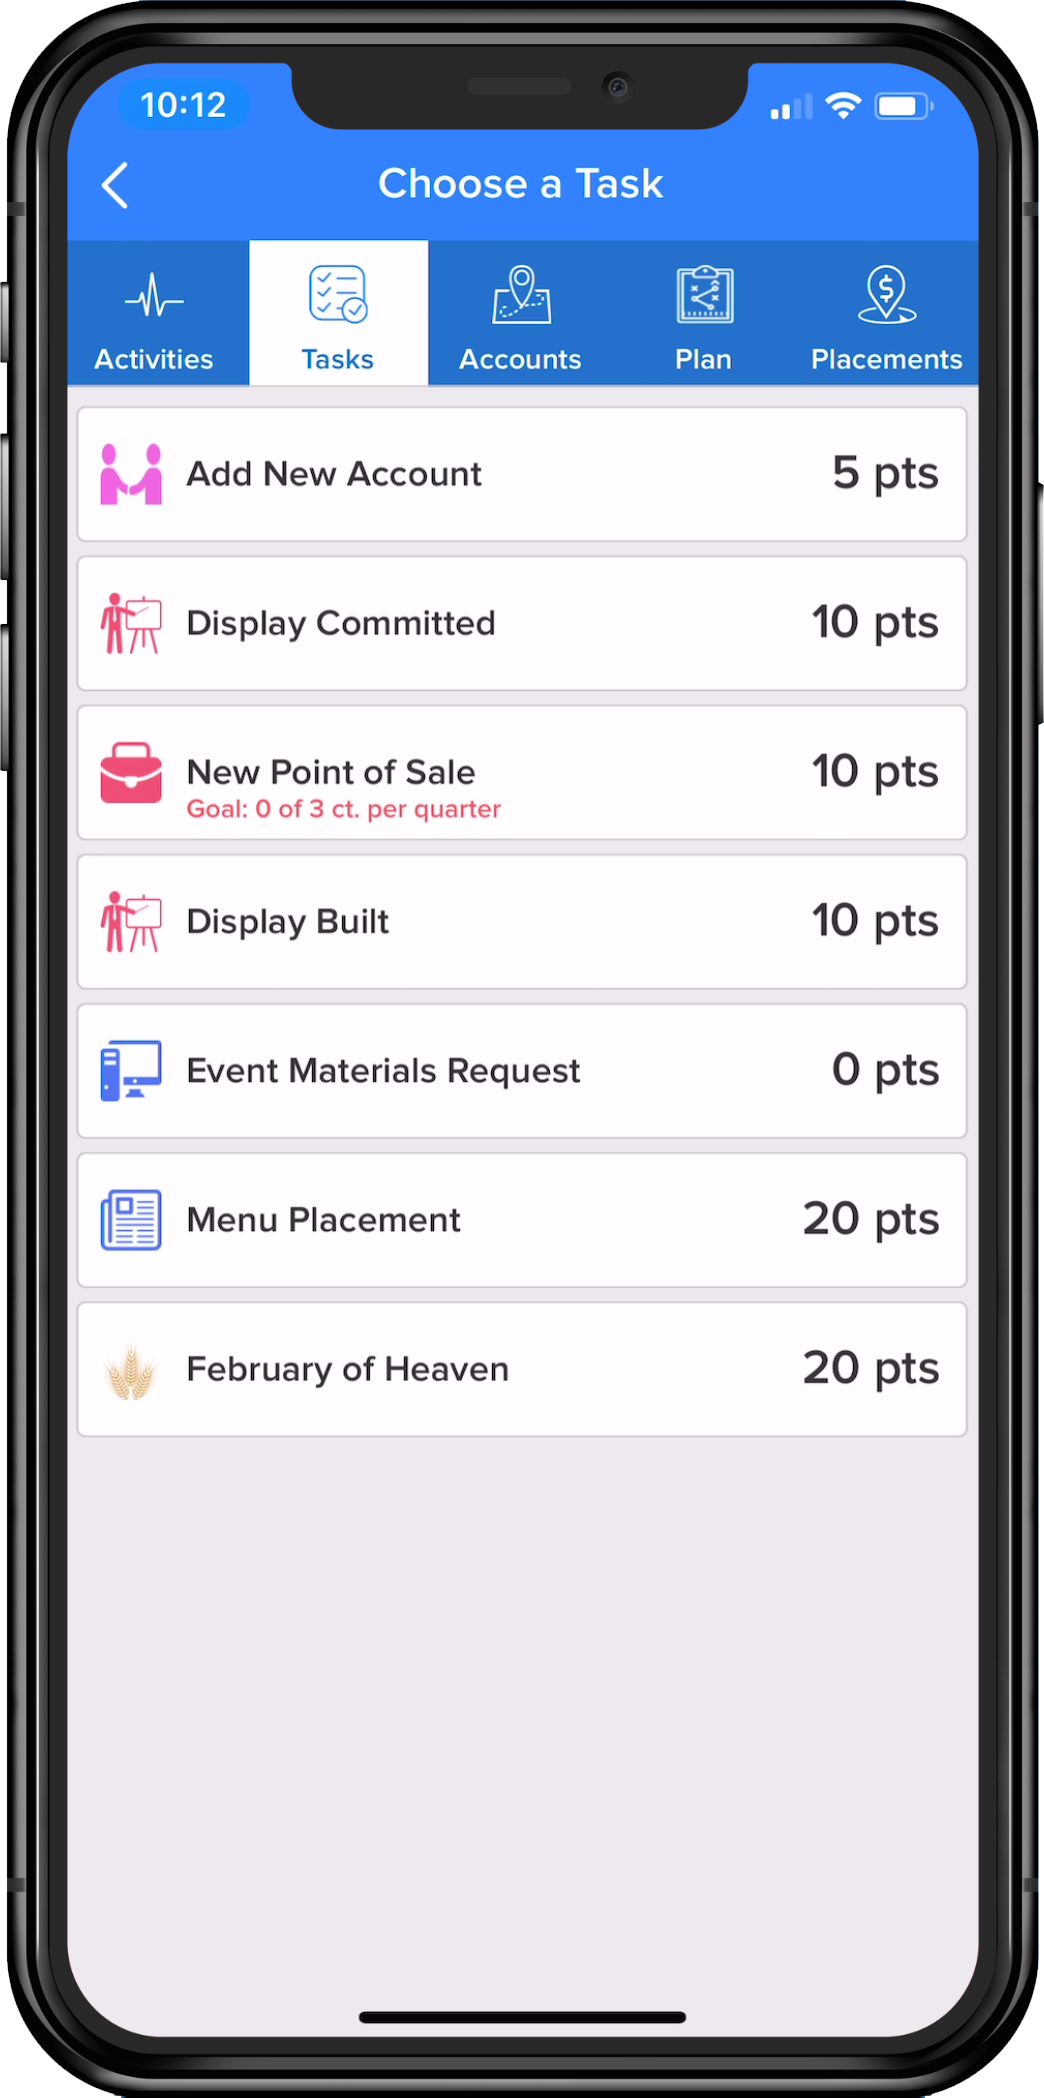
In the Tasks tab, select the “Add New Account” task from the list (this can be located anywhere within the Task list, based on how the Admin set up Tasks - see image above).
Click into the search bar at the top of the screen and search for the account that needs to be added to Lilypad.
- As the account info is entered, if the location exists in Google it should start to populate below the Search bar. Up to 5 search returns will populate. If an account cannot be found using it's name, try using the street numbers in the street address. This may also be necessary if the user is searching for a location that is not close by.
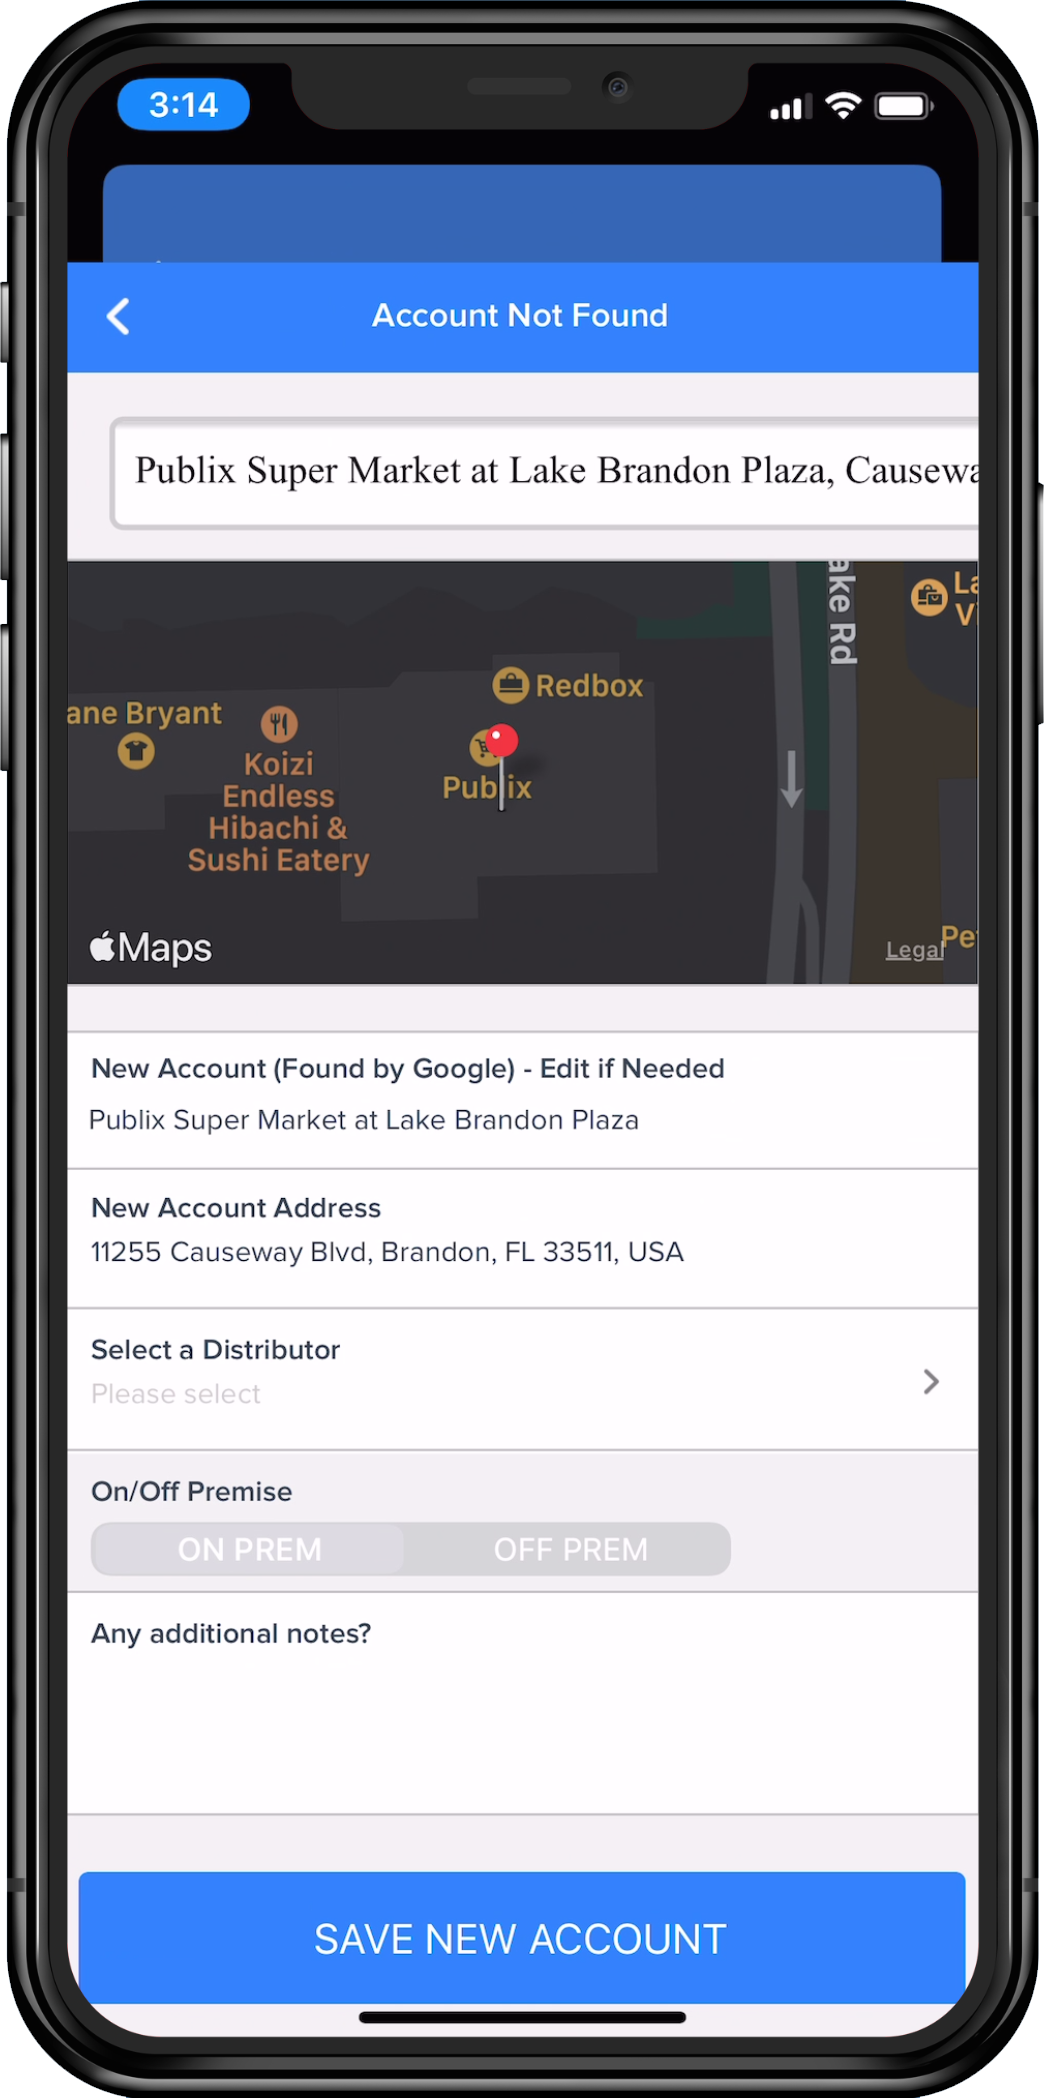
- When the account is selected, the user can - Update/edit the name of the account if needed, select a Distributor, select if On Premise or Off Premise and add any notes specific to the account. After everything has been confirmed, click "Save New Account" at the bottom. This account will be available in the account universe now, and will be indicated with a double asterisk (**) as a manually added account. Manually added accounts do not show sales reporting in (for organizations with data connections).
How to Log a Task
-
If logging while in an Activity:
- Before completing the Activity, click into the “Tasks” tab at the top of the screen.
- Select the Task to be logged.
- The account, and account contact should copy over from the Activity that was being logged.
- Follow steps 2 - 4 below, under logging a Task by itself.
-
If logging a Task by itself:
-
Under the Task tab, select the Task to start.
- If this Task is something to be completed within a specific account, choose the account from the search screen.
- Enter the Account contact.
- If this Task is something that does not need to be completed within a specific account, the task survey will immediately display.
- Fill out each survey question. Required fields are denoted by an asterisk (*) at the end of the field title and are mandatory.
- Click “Done” in the bottom right corner of the app screen.
-
When the completion pop-up opens, there are a number of choices aside from cancelling the Task or taking the user back into the Task.
- “Done” - logs the Task and re-directs to the in-process Activity.
- “Done and Share” - logs the Task and re-directs to the in-process Activity, while additionally auto-generating an e-mail recap of the information just entered in the Task.
-
Under the Task tab, select the Task to start.
Accounts (Map) - Tab
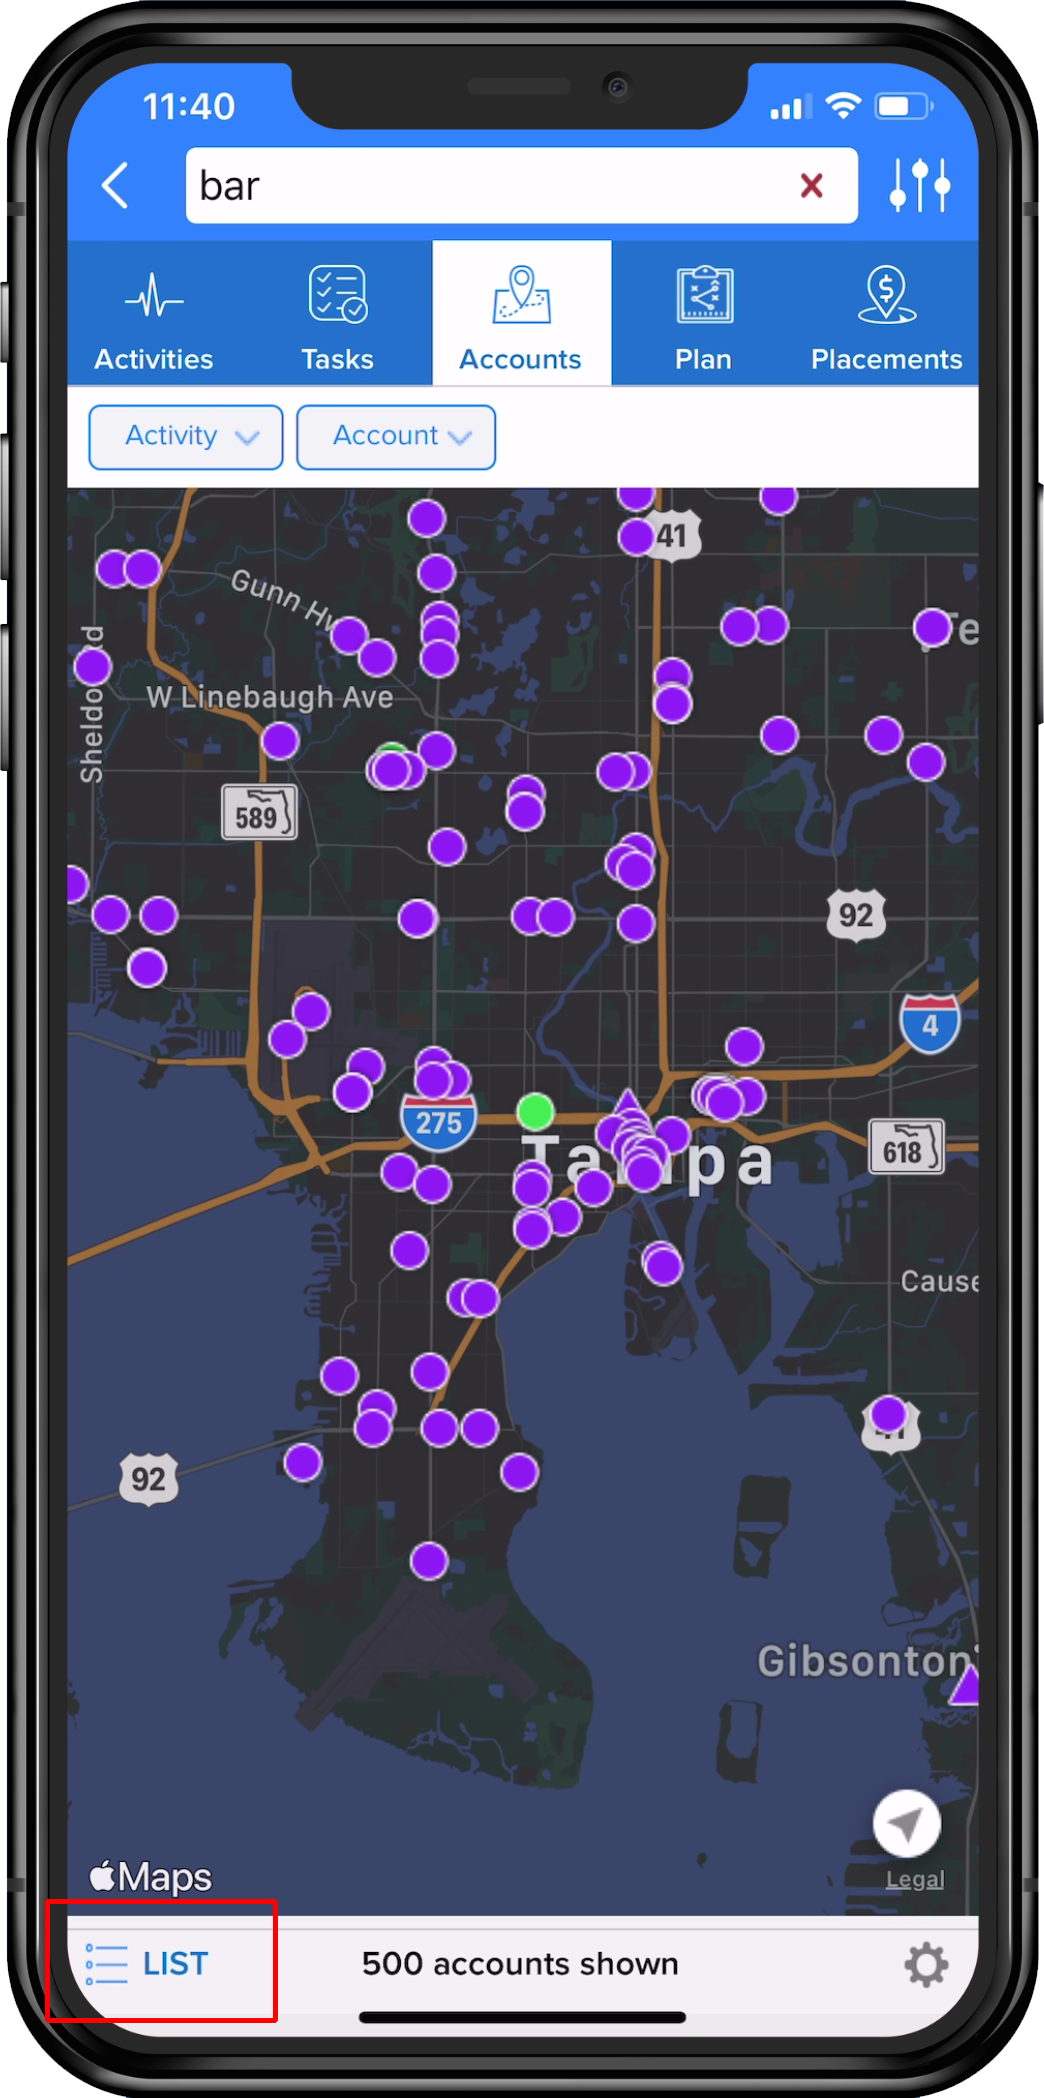
The Accounts Tab can be viewed as either a map - or list view (see the hamburger menu at bottom left labeled LIST - outlined in red in the image above).
- Click on the Accounts tab. Accounts within the loaded Account Universe that are near to the user, should auto-populate. If Lilypad cannot detect the user's position, clicking the gray arrow in the white circle at the bottom right of the map will locate the user. A blue dot will appear on the map, showing the user location. Try zooming out as well to broaden the accounts viewed.
- To search for a specific account, click into the search bar at the top of the screen and search by either the account name or the address. A minimum of at least 3 characters will need to be typed. If the Account the user is searching for results in zero returns, please see instruction here on How To Add An Account.
-
Any accounts in the area will be designated by either a circle or a triangle in one of three colors.
- Triangle - indicates an OFF premise account.
- Circle - indicates an ON premise account.
- PURPLE - indicates that nothing has been logged through Lilypad since the organization has been signed on with Lilypad.
- GREEN - indicates that something has been logged at the account in the last 30 days.
- RED - indicates that it has been more than 30 days since something has been logged at the account.
-
To adjust the scale of the map, pinch the map with two fingers to zoom in and out.
- For additional map viewing choices, click the cogwheel in the bottom right corner of the screen to toggle between city-level and street-level view of the map. The app will save the preference for future searches.
- View an account and its associated information, by clicking on any of the map dots. An account info window will pop up from the bottom of the page, allowing the user to click on the desired account.
- If a user prefers a list view, click on the LIST hamburger menu at the bottom left. When the LIST view is selected, the account list order from top to bottom is the account closest to the user, down to account furthest from user.
- Once an account is selected, the Account Information Page will populate the screen. Please see below on what actions can be taken from this screen.
Account Information Page
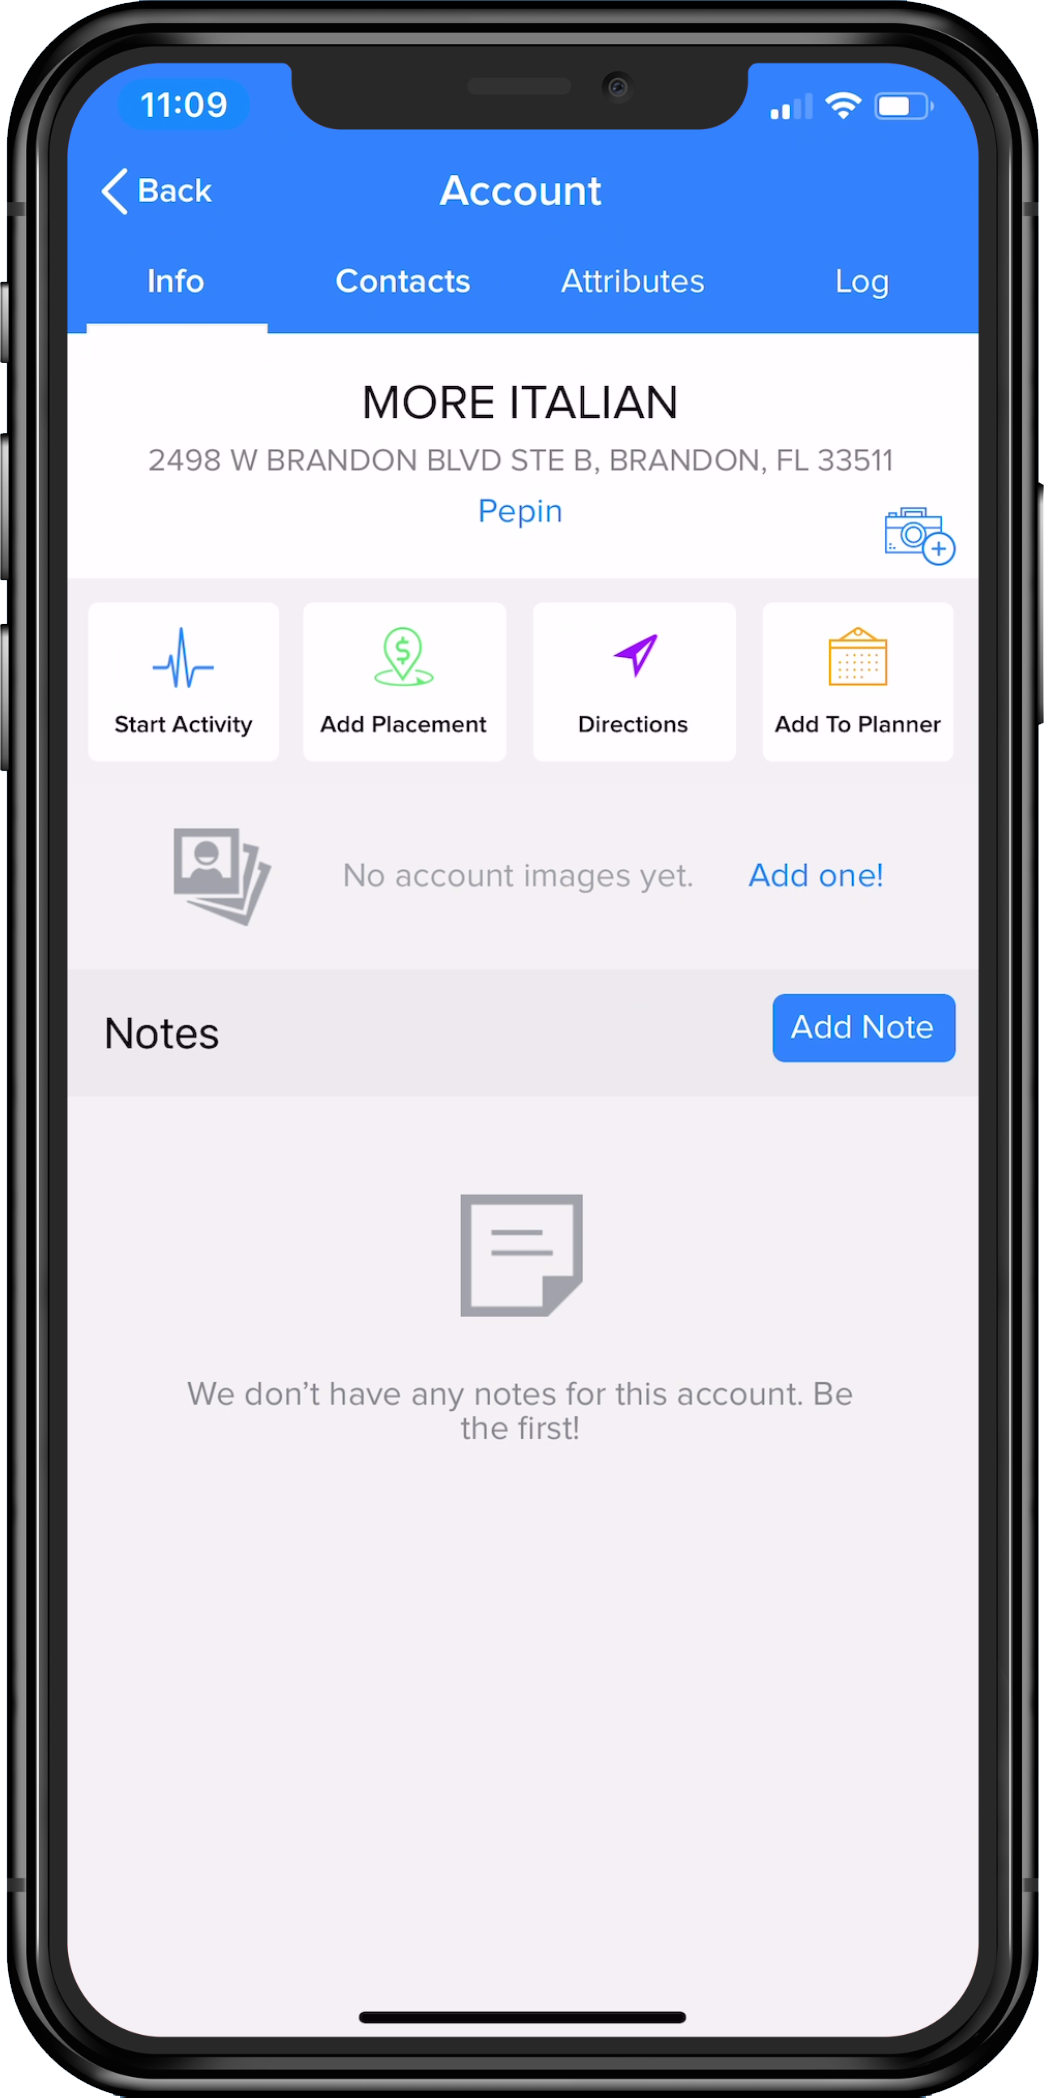
There is usually more than one way to log or enter data within the Lilypad app. Though we may have covered these actions in other parts of the Knowledge Base, a user can typically perform the same or similar actions from one location - the Account Information Page. Any information that is input using this page will be associated with the account and viewable by all users within the organization.
-
Account Information Page Tabs
- Info - this is the default view for the Account Information Page, as seen above. From here, all following actions can be performed.
- Contacts - Second tab at top, click this to view or add Account Contacts and Distributor Contacts. Once clicked, a pop up will request whether this is a new Contact or being imported from the user's device. The user must have granted Lilypad access to the device's contact list for import to work.
- Attributes - Third tab at top, click this to view or add any applicable attributes associated with this Account. Those attributes entered can be used for filters in reports or searches.
- Log - Fourth tab at top, click this to view any logged actions associated with this account. Logged actions can be any actions logged by any users in the organization and is a shared view. It is the easiest way to tie information to an Account that a user wants to share among the team.
-
Action Buttons
- Start Activity - An Activity can be started from this button. Once clicked, a list of all Activities and Tasks associated with the user's Lilypad will populate. Click on any one of the Activities or Tasks to start logging that action.
- Add Placement - A Placement can be made by clicking on the Placement button. The 'Add New Placement' page will pop up and allow the user to input easily.
- Directions - Once this button is clicked, a new window will open in the Map that is standard for the user's device, showing the exact location of the Account with directions on how to get there.
- Add To Planner - clicking this opens the 'Add Planner Item' window. Enter the data required and the planner item will be added to the Lilypad Planner and any associated device calendar if that is check marked.
-
Account Based Notations
- Add Images - there are two icons in this space that can be clicked to activate adding an image. To the right, just above the 'Add To Planner' button, there is a camera icon - OR - the blue hyper link below the same button that says 'Add one!'. Click either for a pop up that allows the user to add by taking a new photo or uploading an existing one from the internal image library.
- Add Notes - click the blue 'Add Note' button on the bottom right to add any applicable Account notes. These notes are automatically shared with anyone within the organization and can be viewed on both the mobile and web app.
Filter Options
Filtering Options are available in the top right corner of the screen. The sideways abacus icon can be clicked in order to see these filters.
- Activity – filters accounts based on any Activity or Task that has been logged at accounts.
- Sales – filters accounts based on buying or non-buying accounts, and is broken down further by buying or non-buying period, specific brands purchased or not purchased, and specific SKUs purchased or not purchased.
- Distributors – filters accounts by a specific distributor. This is helpful if multiple Distributors are selected for that Account Universe.
- Premise – filters accounts by either on or off premise accounts.
- Attributes – filters accounts by any map-enabled attributes that have been tagged to accounts previously.
Plan - Tab
The Plan tab houses both "My Lists" and "My Calendar" (known as Lists and Planner on the web version of Lilypad).
My Lists
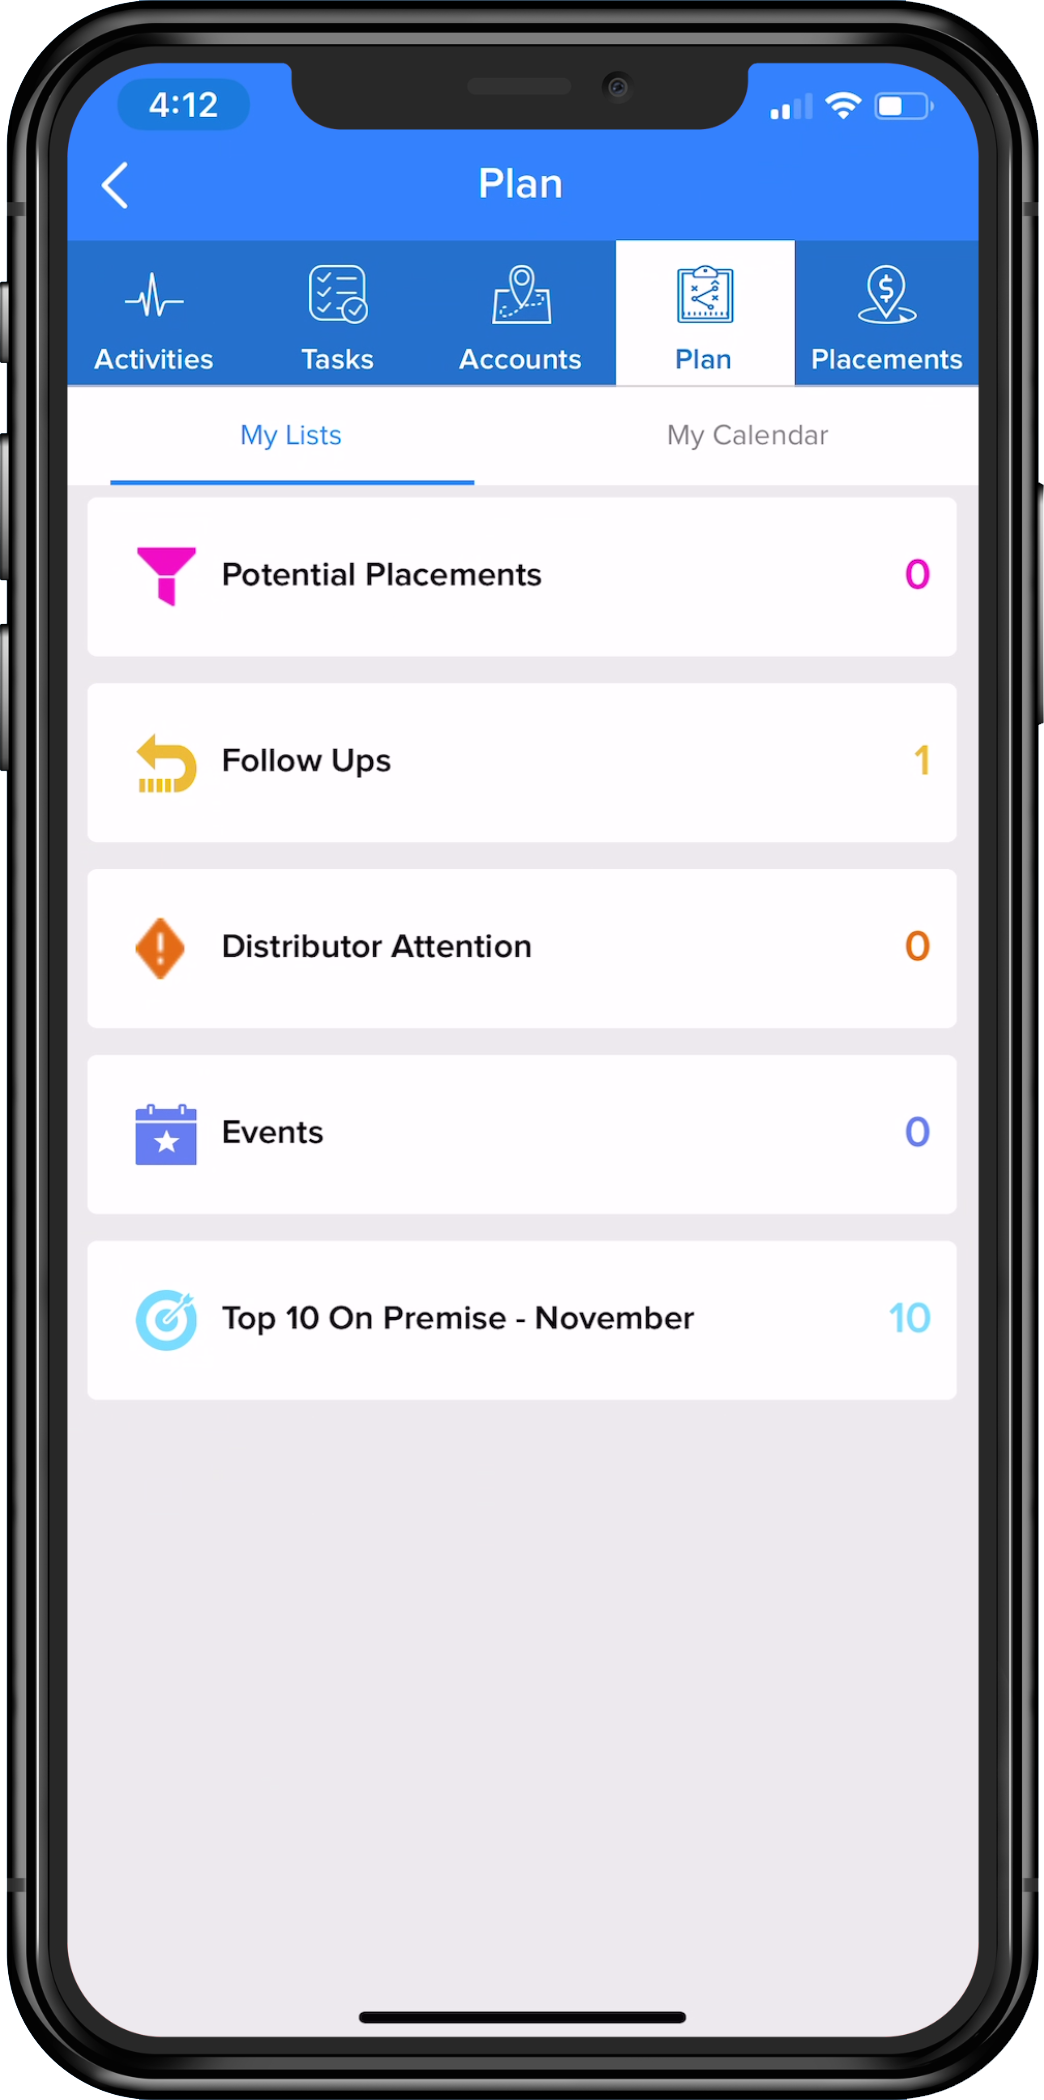
The 'My Lists' menu, shows category selections for Potential Placements, Follow Ups, Distributor Attention, Events and any Target Lists that have been specifically created for the user. When any one of the categories are clicked on, a list will populate of Accounts that have been tagged for that list. A user can also add more accounts to all lists except for a Target List - only an Admin or Super User is able to edit Target Lists.
-
There are 4 default lists:
- Potential Placements – accounts that are interested in product but have not yet given a hard commitment.
- Follow Ups – accounts where follow-ups have been scheduled for future dates and times.
- Distributor Attention – accounts that need specific attention from the distributor.
- Events – accounts where events have been scheduled for future dates and times.
There are multiple places to add an Account to any one of these default lists.
Through an Activity or Task -
- While in the Activity or Task, at the bottom of the set of survey questions, 3 buttons are shown for Potential Placements, Distributor Attention and Follow Up. Click on any of those buttons during an Activity or Task to add to the list.
Through the 'My Lists' menu -
- Click on My Lists under the Plan tab.
- Click on any lists to add an Account to that list.
- Click the '+' sign at the upper right corner of that list.
- Either search for an Account or choose one from the populated list.
- That Account will now exist under the chosen list.
Utilizing Lists
-
A button is provided at the bottom of any lists in order to toggle between List and Map view. For Target Lists, an additional 'Stats' button is provided for easy viewing of -
- Total of Accounts in Target List.
- Visits This Month.
- Commitments (can be further clicked for details).
- Total CEs this Month (can be further clicked for details - cumulative across all accounts and all reported invoices from distributors ).
- A goal tracker for any Target List Goals.
-
Each list will have it's own pop up menus when an Account is long-pressed (click and hold click).
-
Potential Placements. Long press an Account results in -
- Add Placement
- Start Activity
- View Account Details
- Remove from list
-
Follow Ups. Long press an Account results in -
- Add placement
- Start Activity
- Modify Date/Time
- View Account Details
- Complete/Remove
-
Distributor Attention. Long press an Account results in -
- View Account Details
- Complete/Remove
-
Events. Long press an Account results in -
- Add placement
- Start Activity
- Modify Date/Time
- View Account Details
- Complete/Remove
-
Target Lists. Long press an Account results in -
- Add Placement
- Start Activity
- View Account Details
- Add Placement
-
Potential Placements. Long press an Account results in -
My Calendar
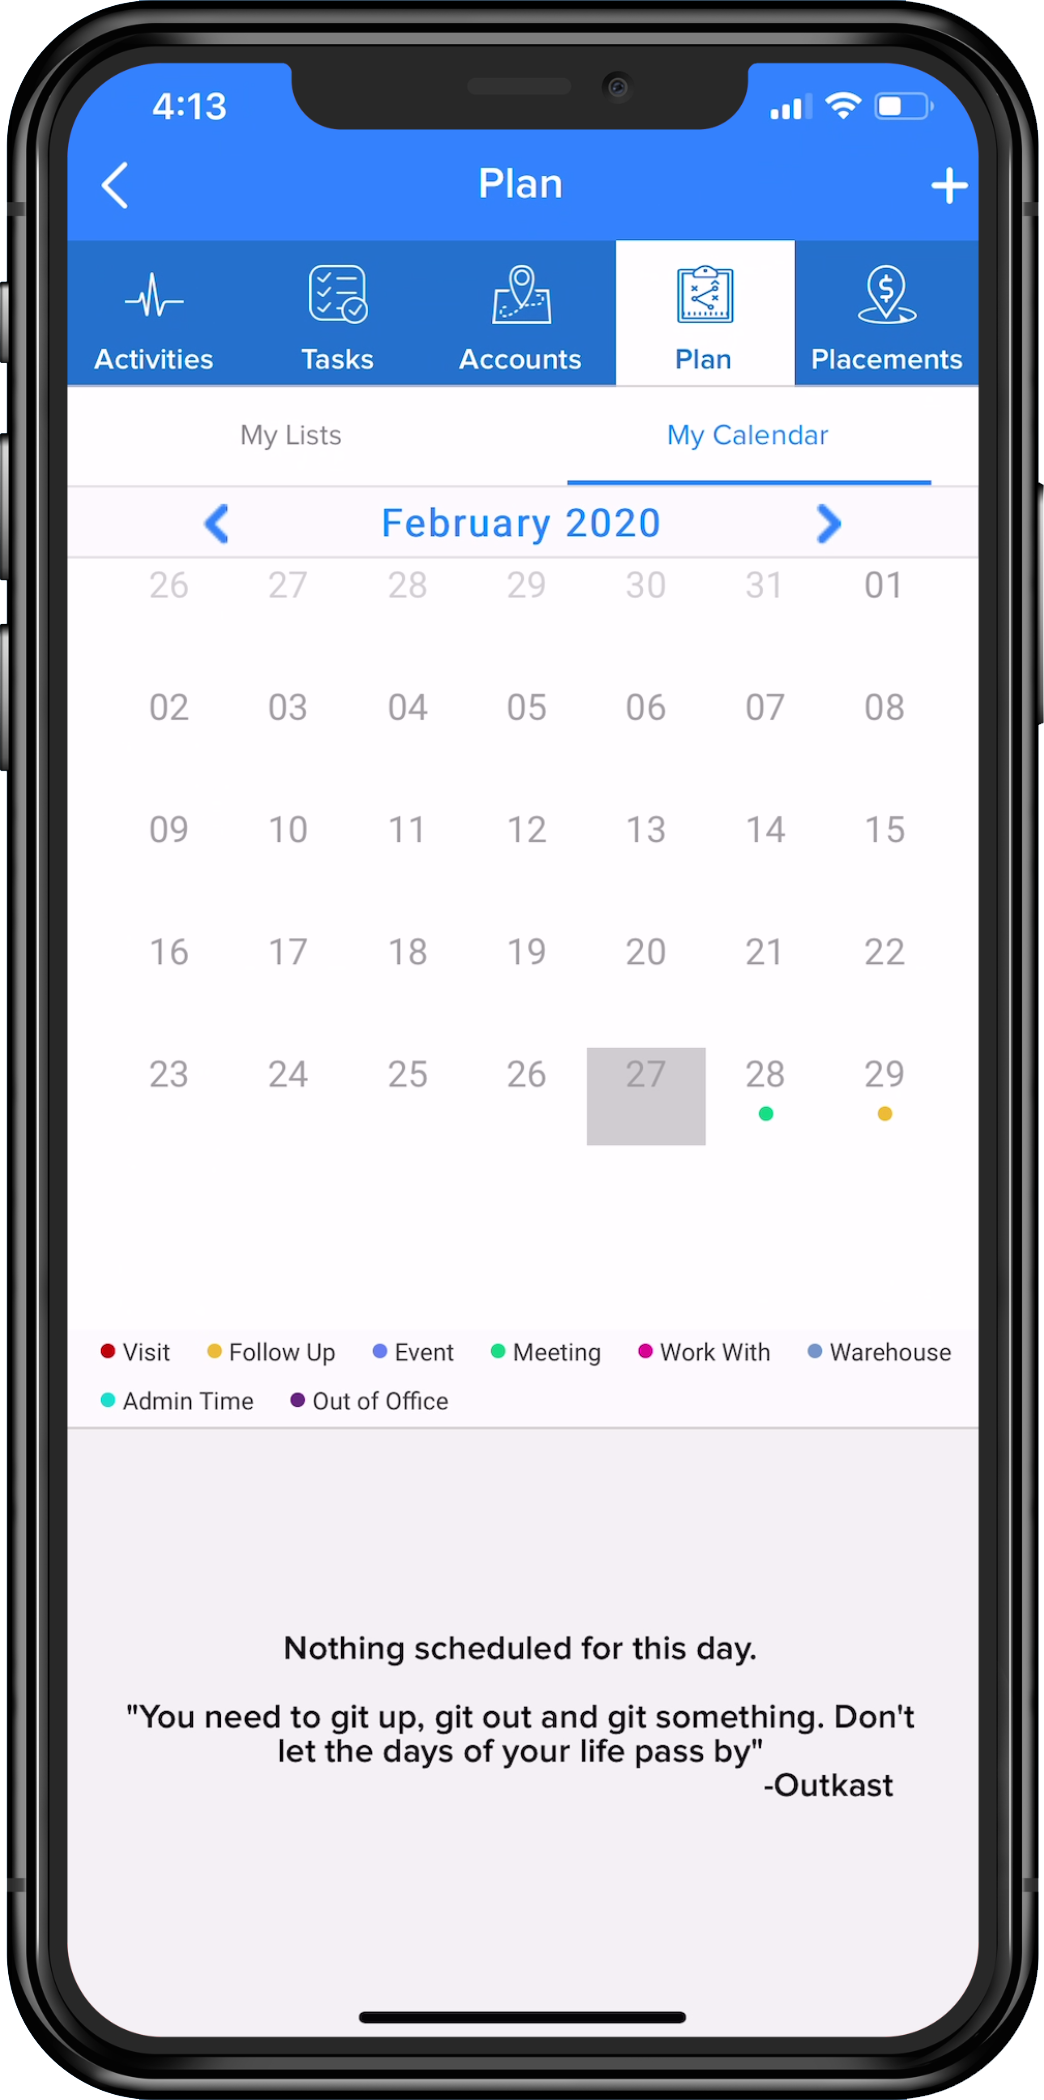
My Calendar - this will show all planned activity as colored dots for a quick view on a user's planned day. Color codes are called out in the legend below the calendar and dates can be clicked on to see what activity was planned for that day. As a day is selected, any activity that was planned for that day will show in a list view under the color code legend.
A user can add any of the following planner items by clicking into the plus sign in the top right corner of the screen:
- Visit
- Follow Up
- Event
- Meeting
- Work With
- Warehouse
- Admin Time
- Out of Office
Adding Planner items:
- If the item choice is tied to a specific account, search for and select the account. If this is not tied to a specific account, skip this step as it is not applicable.
- Set the date and time of the scheduled planner item.
-
Enter the duration.
- Recurring items can be saved as daily, weekly or monthly.
- Choose when to be reminded of the upcoming planner item.
- Add any notes about the planner item.
- If the box for “Sync with Default Device Calendar” is checked, this will copy the planner item from the Lilypad planner, into the default calendar on the device (IE; Google Calendar, iCal, Outlook Calendar, etc.).
- Click “Create” to actually add the planner item to the planner in Lilypad.
- After adding the planner item, click on the day that the item is set for. Clicking on the day will show a list for all planned items so far, in chronological order.
- The account details page can be accessed by clicking on the arrow to the right side of the screen.
- If an account is long pressed, a user can choose to start an activity or task, add a placement, edit the date/time of the planner item, or delete the item from the calendar. If the planner item does not coordinate to a specific account, the only options available are to edit the date and time of the planner item or delete it entirely.
Placements - Tab
The Placements tab provides a scroll-able funnel of information. Each category is labeled and color coded.
Potential ---> Committed ---> Aging ---> Matched Issues ---> Fulfilled ---> Lost
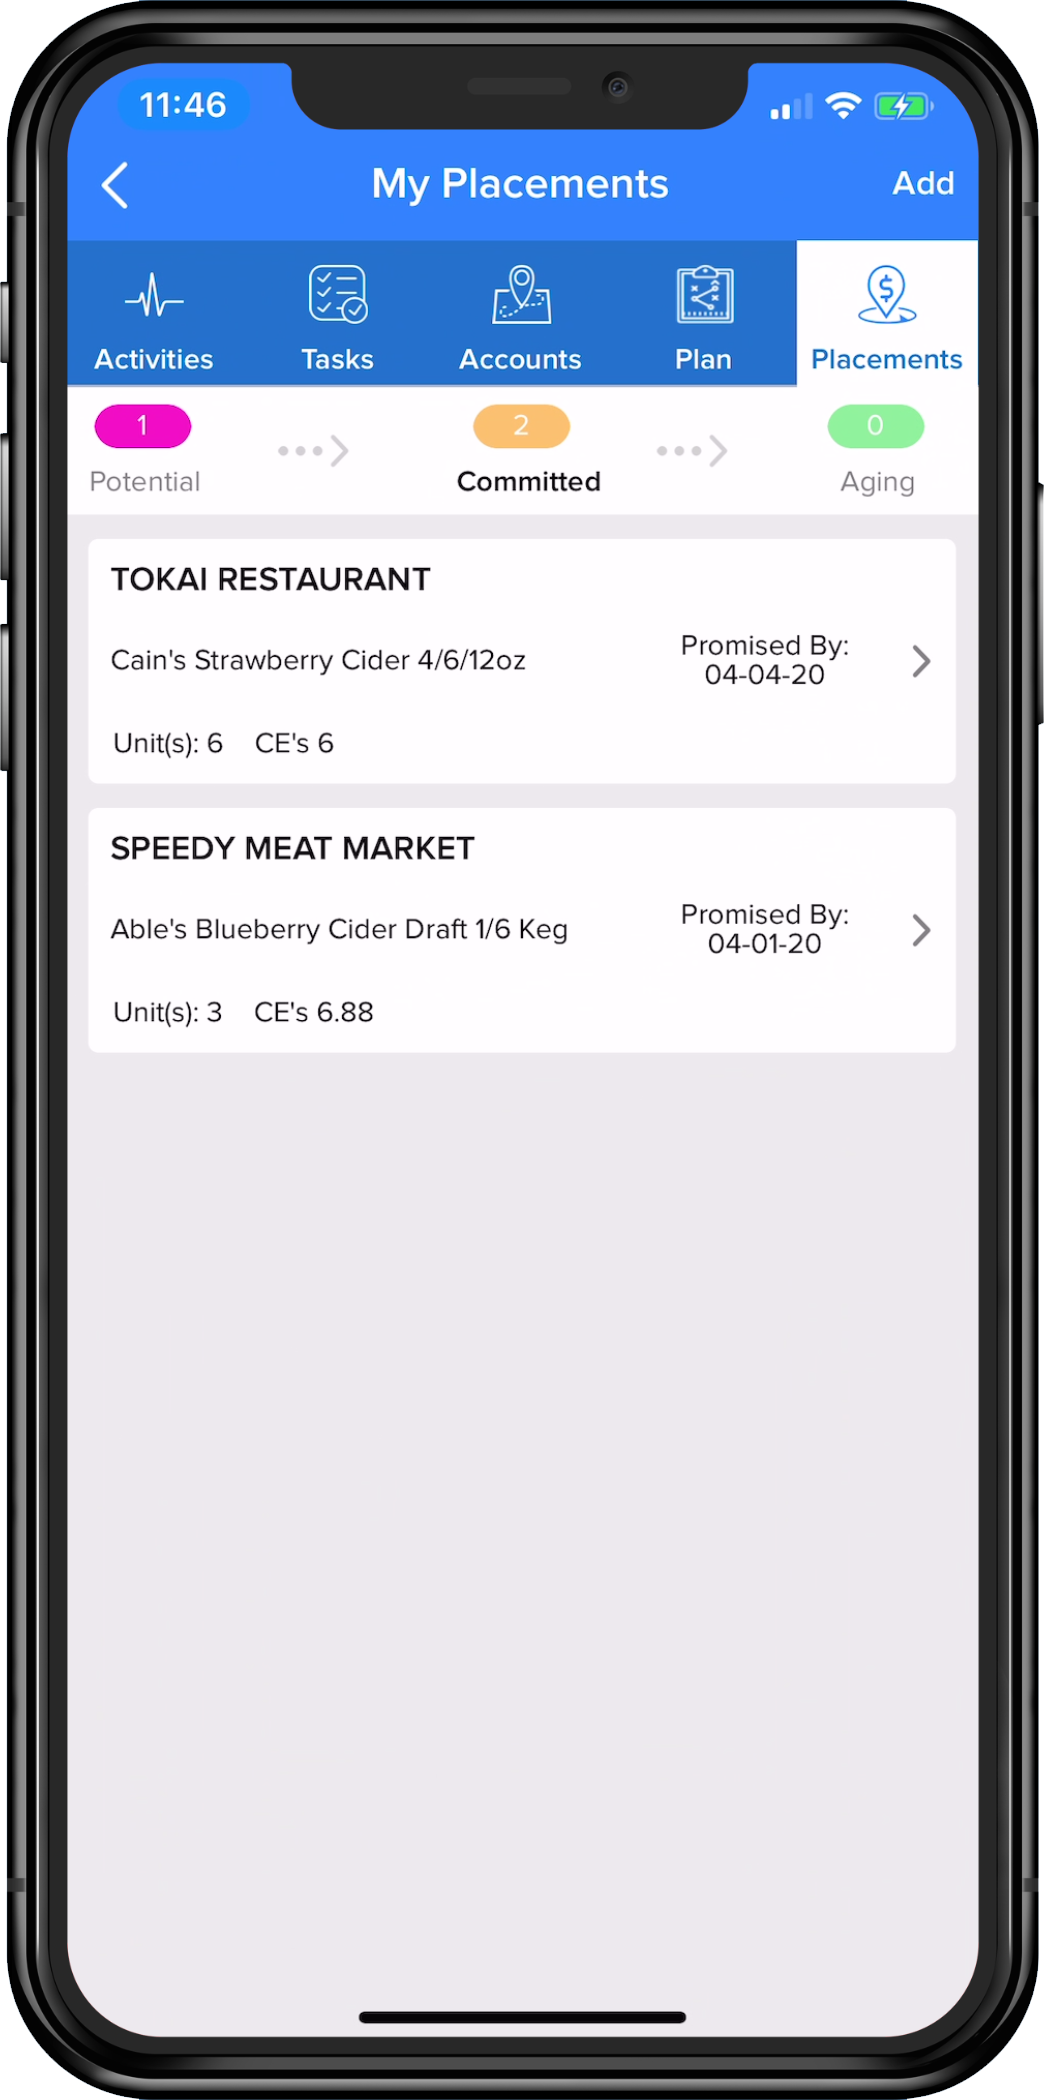
As a user lands on each funnel category, any placements that fall into that category will be listed beneath it. See the example above of the Committed category.
Add a Placement
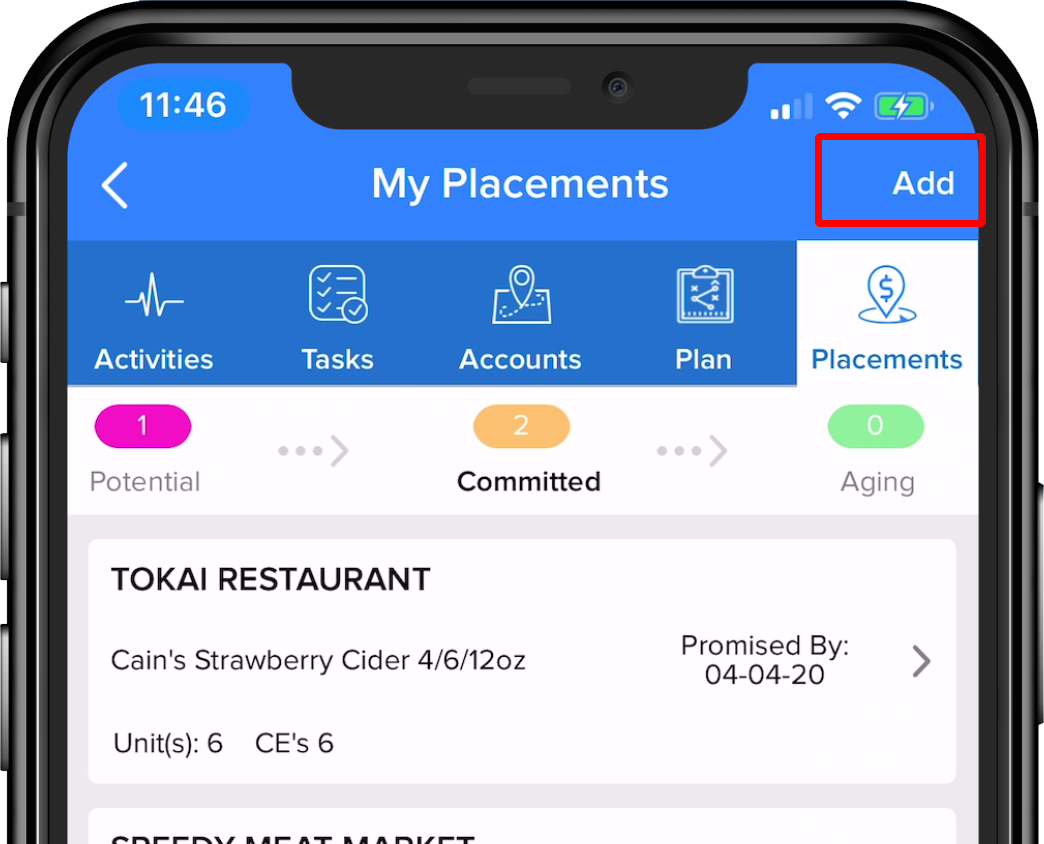
- While in the Placements tab, click the word “Add” in the top right corner of the screen.
- Search for and select the account that this Placement is being made for.
- If necessary, enter the Approved By (account) contact information as well as the Distributor Contact information.
- Click on either Draft or Package depending on the type of Placement being made.
- Press the blue SELECT button to choose the SKU.
- Enter the number of units that the account is committing to.
-
Set a Promised By date -
- **IMPORTANT - choosing a Promised By date, determines in Lilypad how long that Placement will sit in the Commitment portion of the funnel.
- It is suggested that the Promised By date is set for a minimum of 7 days from the date that the Placement is being entered. Example: Beer Rep John is creating the Placement on January 1st, he sets the promised by date for January 8th.
- Lilypad defaults to 21 days in the Committed category of the funnel. If the Placement has not yet matched to an invoice by that Promised By date, the Placement will move to the Aging category and sit for another 21 days awaiting an invoice that matches. This time frame can differ based on the specific organization’s settings, so check with a manager to find out how the Placements funnel is setup.
- Add any notes about the specific placement if there’s something unique to note.
- If there are additional SKUs that this account is committing to, click the “Add More” button in the bottom left corner of the screen and repeat the steps above.
- Once all of the products are logged, click either “Done” in the bottom right corner (logs the placement in Lilypad immediately) or “Done & Share” at the bottom center of the screen (logs the placement in Lilypad immediately and auto-generates an e-mail that can be shared with the management team and/or the distributor).
**NOTE - Lilypad starts comparing incoming invoices to the Placement funnel from the moment it enters the funnel. Incoming invoices varies widely on when they are received.
How does the Placements funnel work?
There are 6 different categories of the Placements funnel.
- Potential – Shows any accounts that have been added to the Potential Placement list ( Click here for info on Potential Placements ). Nothing will move automatically from this portion of the funnel because there is not a specific SKU for the Lilypad system to track against when processing invoices.
- Committed – First stop for all Placements entered into the Lilypad app. When selected, users can view; Name of the account, the specific SKU committed to, the number of units requested, the total number of CEs the placement is worth, and the Promised By date. That Promised By date might eventually change to display "Days Open". If it does, it is indicating how many days it has been since the Promised By date has passed. The placement will still only sit in the Committed category for a total of 21 days (by default, unless the organization had it changed).
- Aging – If a placement has not matched under Committed, it then moves to this category of the funnel. The placement will sit for another 21 days waiting for incoming invoices to match (again, this can vary depending on how Lilypad was set up by Admin). If the placement does not match it will move to the Lost category of the funnel.
-
Matched Issues – Placements land in this category of the funnel if the invoice that Lilypad received, did not match the SKU or the quantity - ending in only a partial match. To be in this category, the Placement matched for at least one of the aforementioned items.
-
When a placement enters Matched Issues it will sit in that category of the funnel indefinitely. A user can proceed two ways -
- Accept and Close. This will accept the product that has already landed and push it to the Fulfilled category of the funnel while moving the remainder of the product into the Lost category of the funnel.
- Accept and Wait for Exact SKU Match. This will accept the product that has already landed and move it to the Fulfilled portion of the funnel while moving the remainder of the product back into the Committed category. This allows the product to cycle through the system one more time in hopes of catching a later invoice.
- If neither of these are acceptable, and a rep needs a placement to be manually matched - the rep will need to reach out to his or her manager and ask them to manually match the placement.
-
When a placement enters Matched Issues it will sit in that category of the funnel indefinitely. A user can proceed two ways -
- Fulfilled – If a placement matches 100% to an invoice that is reported to Lilypad, it will land in this category of the funnel. The Fulfilled category will display; Monthly Date Range (can be changed), the total number of placements entered for the selected month, the fulfilled, remaining and closing percent of those Total Placements and Total CEs as well as the overall Total CEs for the selected month.
- Lost – If a placement lands in the Lost category, that means that it is no longer being tracked against incoming invoices. When placements move to Lost a notification is sent to the user. It cannot be moved back through the funnel and a new placement will need to be created in it's place.